Input Form to Get Data and Store it in Another Tab in Excel
How to make a user input form in Excel and have the data stored on another worksheet at the click of a button.
This method uses a simple-to-create input form that anyone can make and maintain within the worksheet and does not cover UserForms that are made in VBA and that can be quite tricky for users to create and maintain.
This tutorial does use a macro to get the data from the input form to the worksheet where it will be stored but don't worry, I will cover that step-by-step.
Sections:
Create the Macro to Store the Data
Create the Input Form
First, we create the form where the user will input the data. You can spend a lot of time or a little doing this but the most important thing is that it is easy for the user to understand what to do.
Here are some steps for a basic form that I like.
- Create a title and give it a title-like format:
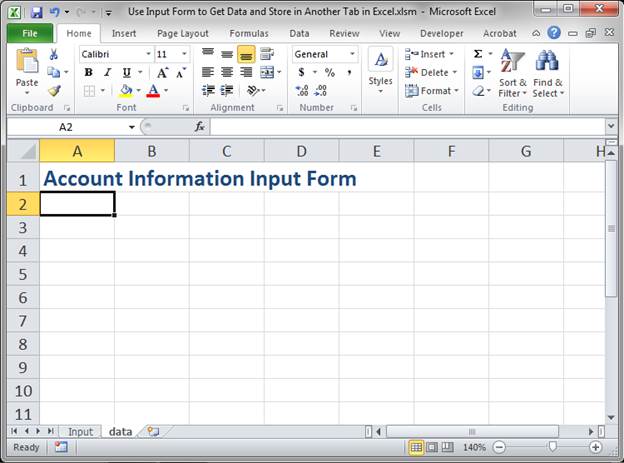
- Skip a row and then input the form field's titles. Skip a row between each form field. This allows you to control the spacing between the fields and that can make it easier to use.
Also apply some basic formatting to the title; I just make them bold.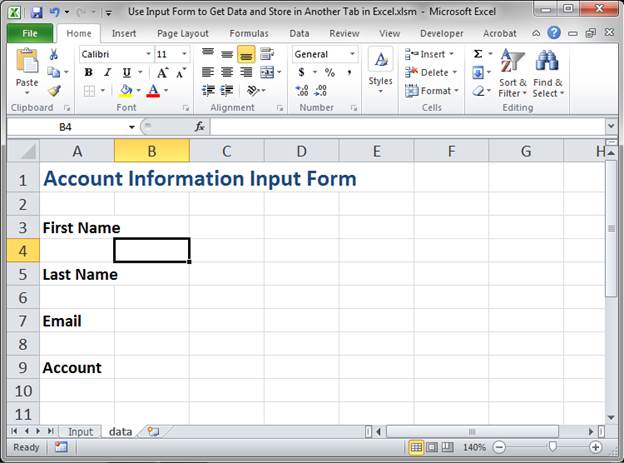
- Adjust the spacing between each field by selecting the empty row between them while holding the Ctrl button.
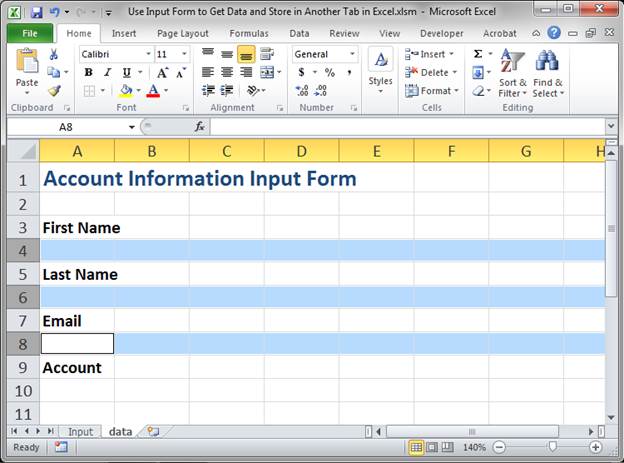
Then, change the height of one and all will change at the same time.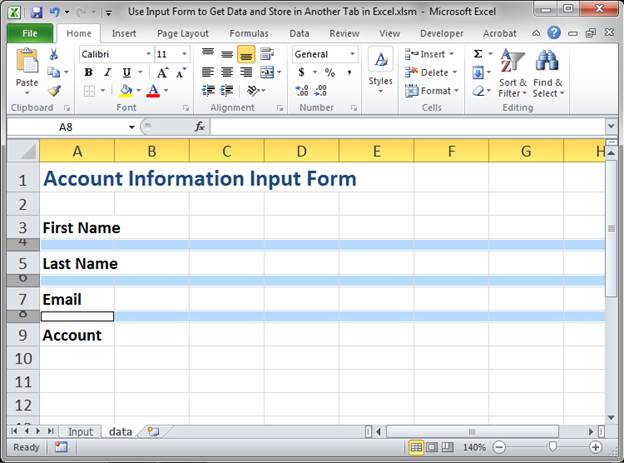
- Make column A just big enough to show the titles for the form fields. Then make column B small; we will use this column as a separator between the form input field and title.
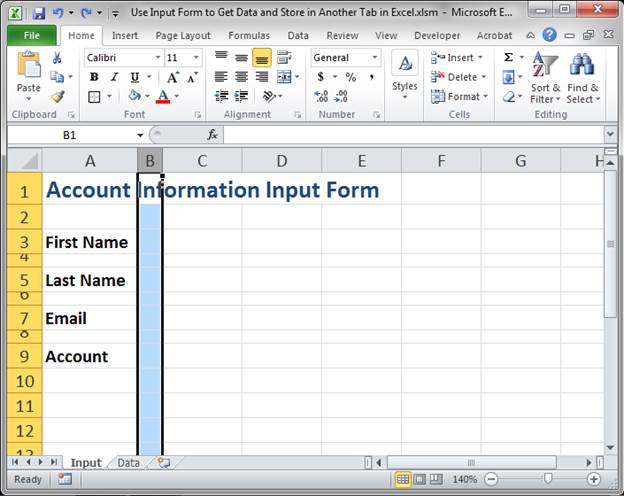
- Click the square in the upper left of the rows and columns or just hit Ctrl + A to select everything.
Click the paint bucket in the Font box on the Home tab and select a grayish color for the background.
You will now have something like this: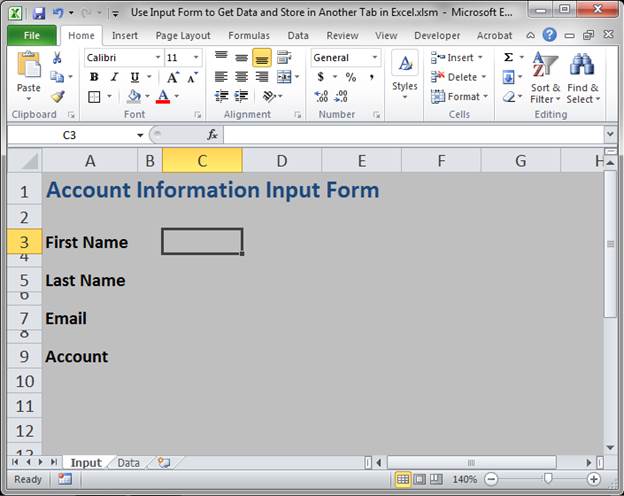
- Select the cells in column C that are in the same row as the form field titles and make their background white.
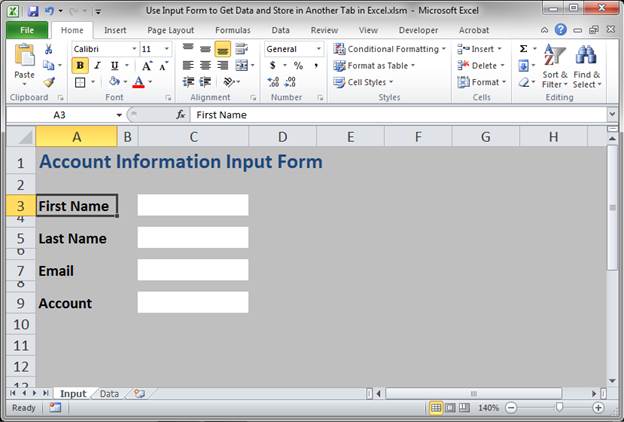
If you want, you can add a full border around each white cell; some people like that. - Time to add the button.
Go to the Insert tab and click Shapes and select a Rounded Rectangle from the list.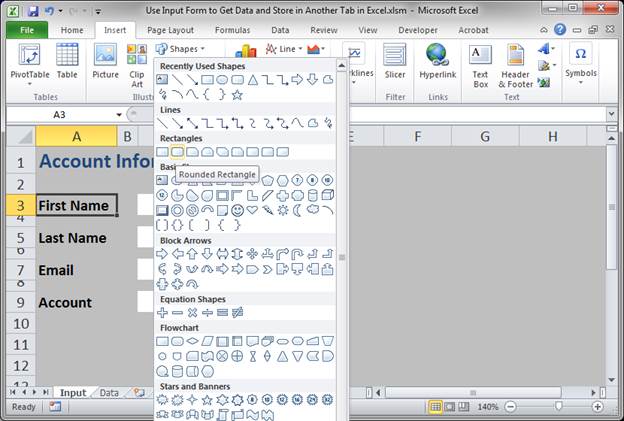
Then, left-click on the mouse, hold, and drag until you have the desired size for the button.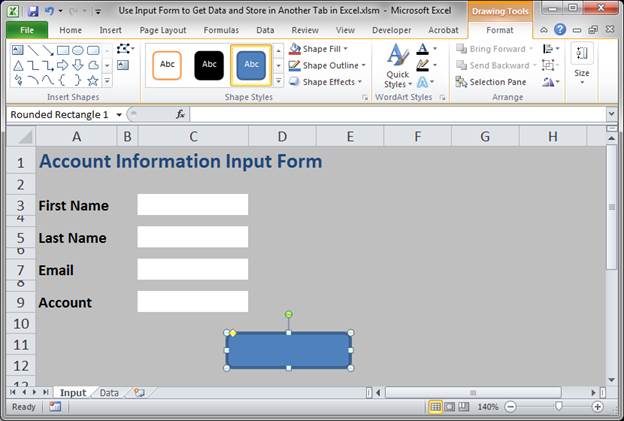
Make sure the button is selected and then go to the Format tab that will appear and click the bottom arrow in the Shape Styles section and select a pre-made one from there if you want.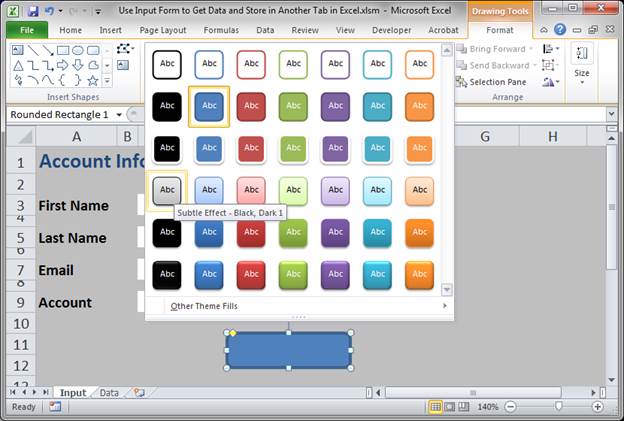
Click the button again and type some text.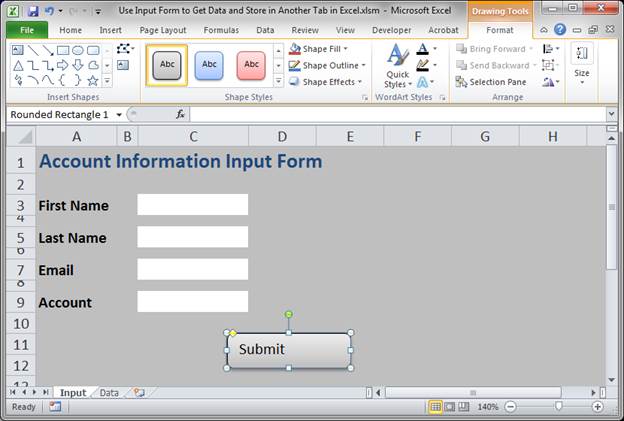
Hit the Esc key when finished and then go to the Home tab and change the formatting of the text like you would regular text in a cell.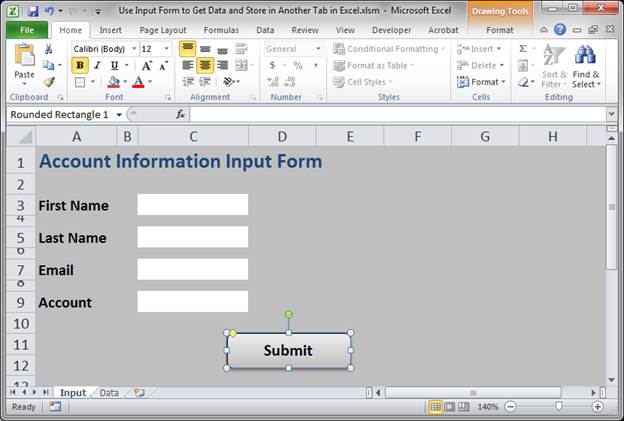
Now we have a pretty decent form. - Before we continue, I want to add a name to each input field. This will make creating the macro much easier.
Select the white input field for first name and then look to the white box just above where it says column A, that is the Name Box and that is where we will type a name for this field; I named mine first_name. Once you type the name, you must hit Enter. (hint: you can't use spaces in the name)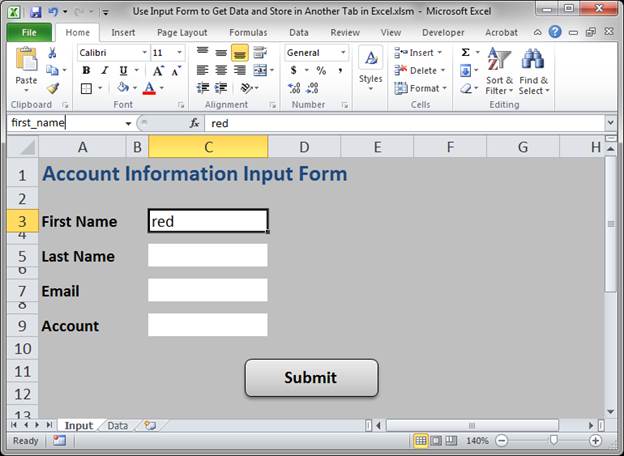
Repeat this for the other fields until each one has a unique name.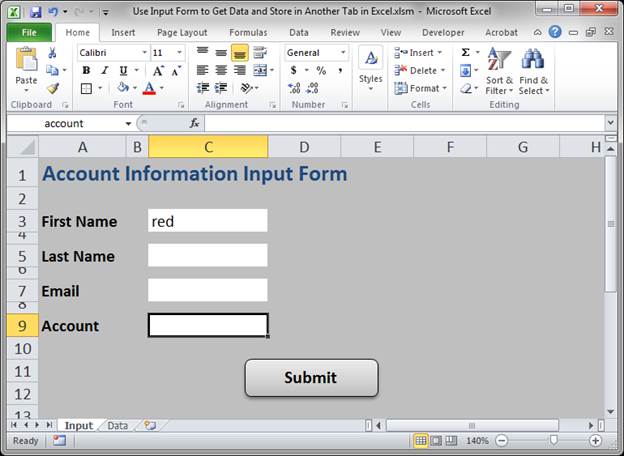
- To finish the form's appearance, go to the View tab and look in the Show section.
Uncheck Formula bar, Gridlines, and Headings.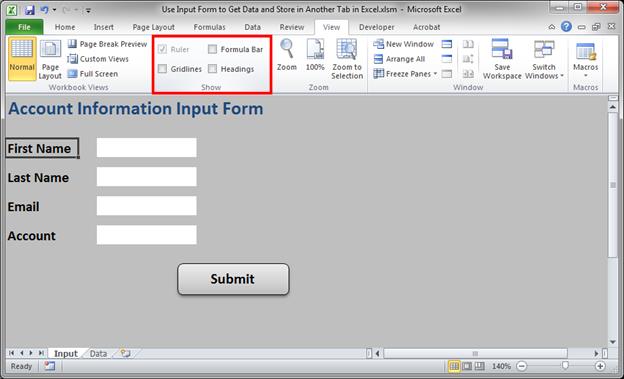
- Resize the window and hide the ribbon menu (you can use a macro to completely hide the ribbon menu if you want).
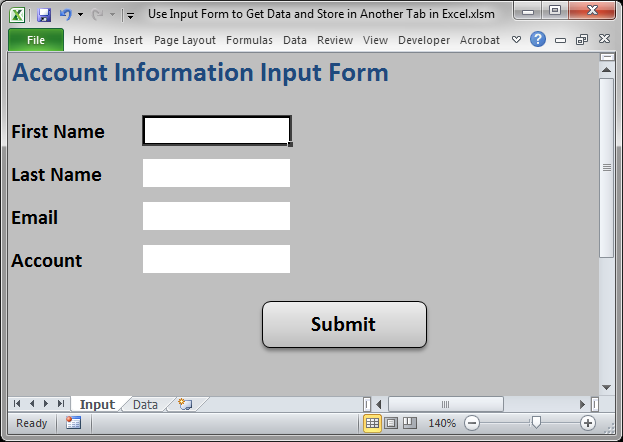
Now you've got a nice little form.
You can also lock the worksheet and leave only the 4 white input fields unlocked if you want to protect the form and you can use Data Validation to make sure the user inputs the correct type of data.
Create the Macro to Store the Data
Now that you have a form, let's make that Submit button work.
Here, I will show you how to make a macro, but it will be easy to follow, I promise.
- Figure out where you will put the data. You can have it emailed somewhere, inserted into a real database, or simply stored on a separate worksheet. I'll be covering the last option here, so the first step is to create the worksheet and make sure we know where the data will go.
I created a worksheet named Data and put a title for each column that will hold data.
You also need to add a title row for your data in order for the macro I make here to work.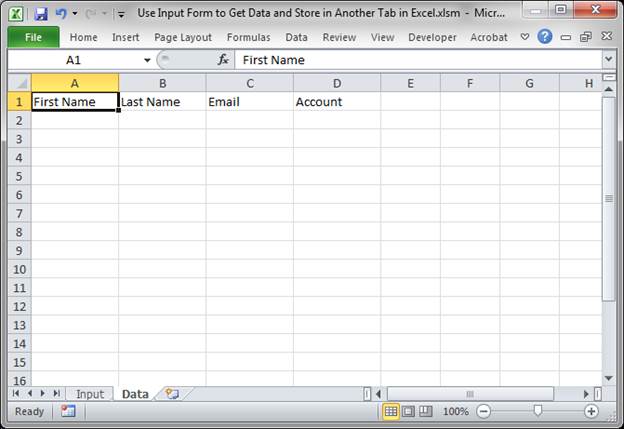
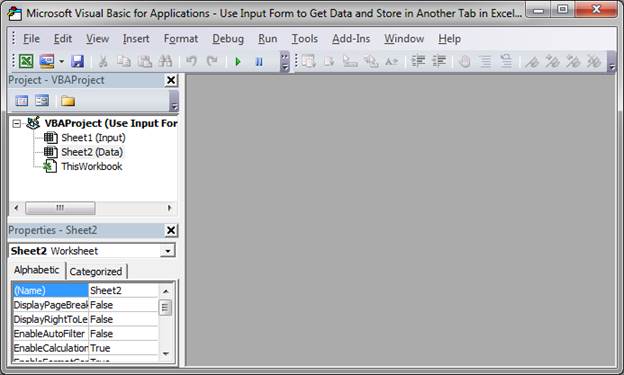
- Time to create the macro. Hit Alt + F11 to go to the VBA window. It should look like this:
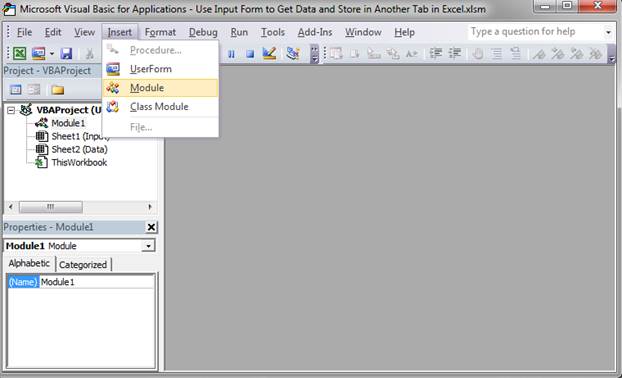
- Go to Insert > Module.
A blank window will open: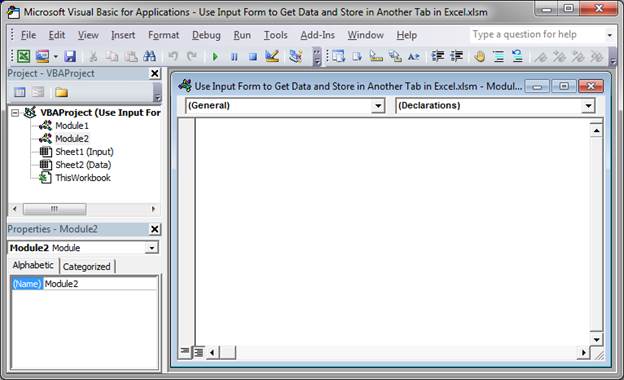
- Type sub then a space and then the name you want to give the macro.
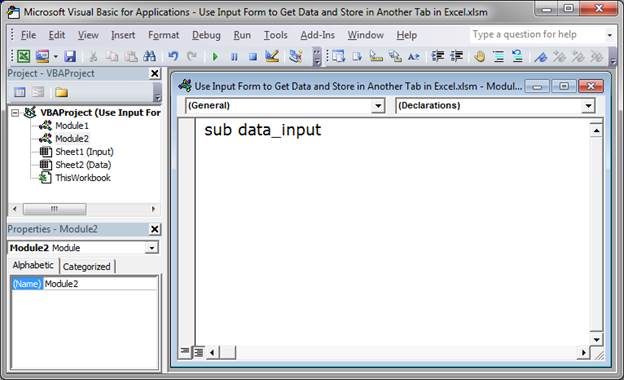
Hit Enter and it will automatically be formatted like this: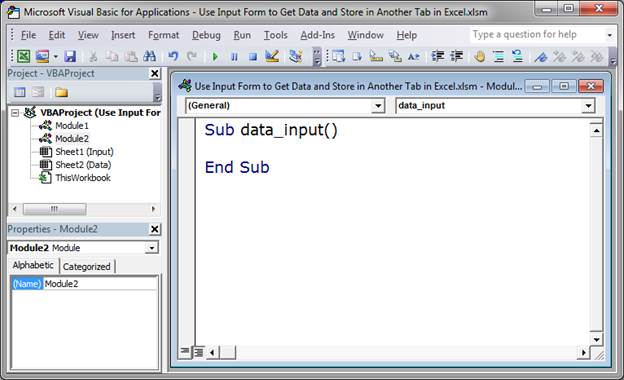
- To start the macro, I store the name of the worksheet where the input will be stored, the Data worksheet. This is something that you don't have to do but it will help a lot if you ever change the name of the worksheets.
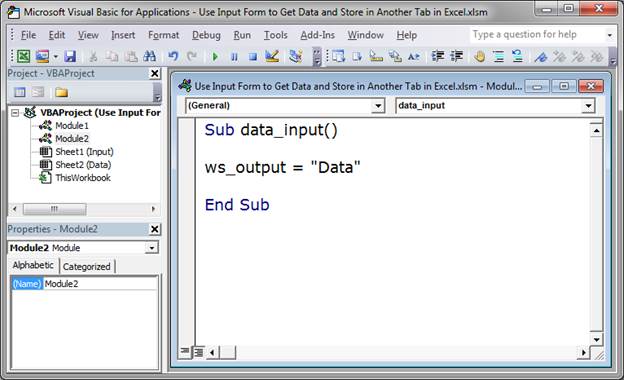
The variable ws_output stores the text Data, which is just the name of the worksheet where the data will go.
(Since we gave a unique name to all of our input fields in Step 8 of the first section of this tutorial, we do not need to store the name of the data Input worksheet.) - Now, we need to find out what the next empty row on the data worksheet is so that we don't overwrite anything.
This piece of code will find that row and store it into a variable named next_row:next_row = Sheets(ws_output).Range("A" & Rows.Count).End(xlUp).Offset(1).Row
This line of code can seem confusing but, to be honest, you don't really need to know how it works except that ws_output needs to contain the name of the worksheet where you want to put the data and A is the column where you will put data that the user must always input; this column should not store optional data or you will end-up overwriting some data if the user chooses to leave that field blank.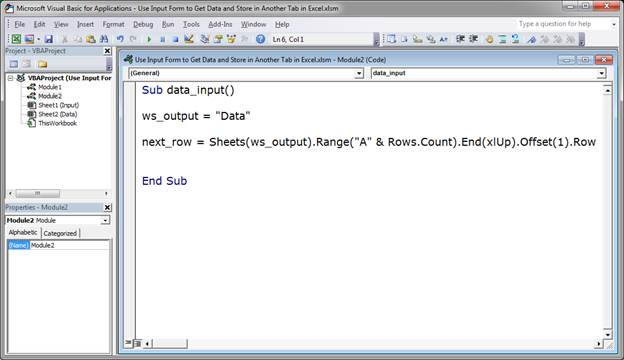
To learn more about this line of code, go to the tutorial here: find the next empty row in a worksheet - We now know where the data should go and where the next empty row is; next, we just need to take the data from the Input worksheet and put it into the Data worksheet.
Here is how it's done with the First Name field.Sheets(ws_output).Cells(next_row, 1).Value = Range("first_name").Value
ws_output is the variable that stores the name of the Data worksheet.
Cells(next_row, 1) says where the data should go on the worksheet. next_row comes from the last step and says in which row the data will be placed. 1 is the column number where the data will go. The First Name value will go into column A and that is the first column, so a 1 goes there. For column B, we would use 2 instead of 1 and column C would be 3, etc.
Range("first_name") is what selects the value from the first name cell on the Input worksheet. Since I named that cell first_name in step 8 of the first section of this tutorial, I do not have to reference the worksheet on which it is located; I can simply put the name of the cell inside Range() and it will get the correct value.
Value is in two places in this line of code and it is used to get the value of the first_name cell and to then put that value into the new cell on the Data worksheet.
Here is the macro with the new line: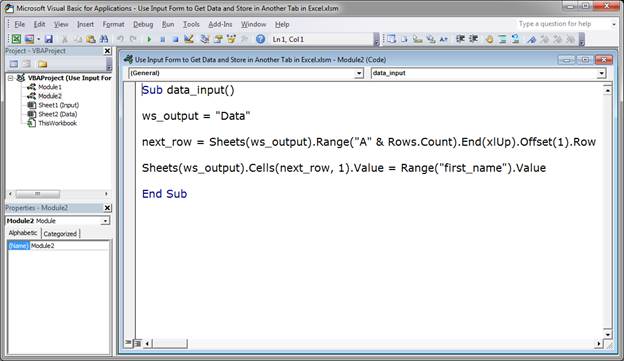
- Repeat Step 7 for every piece of data that you want to store.
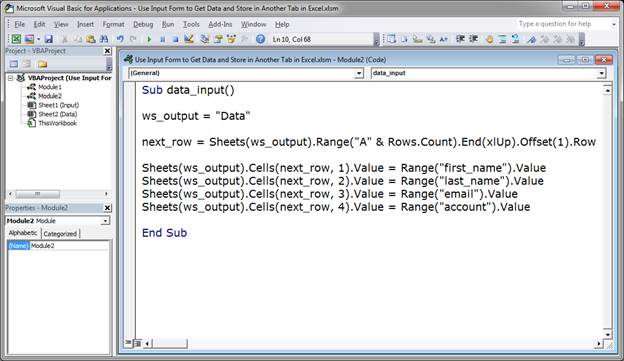
The three new lines here are:Sheets(ws_output).Cells(next_row, 2).Value = Range("last_name").Value Sheets(ws_output).Cells(next_row, 3).Value = Range("email").Value Sheets(ws_output).Cells(next_row, 4).Value = Range("account").Value
These lines will get the last name, email, and account values and put them onto the Data worksheet.
The only thing that is changed in each line is the column in which the data will be placed on the Data worksheet and the name of the cell from which we get the data.
To get the last name value from the Input worksheet, I put last_name in the range method: Range("last_name").
To put the last name value into the second column of the Data worksheet, I put a 2 into the cells method: Cells(next_row, 2).
You can see that each line follows this pattern; the number of the column in the cells method is incremented by one, so each piece of data goes into the next column and the name of the cell in the range method is updated to get the desired piece of data. - Now, go back to Excel, Alt + F11, and attach the macro to the Submit button.
To do this, right-click the Submit button and click Assign Macro.
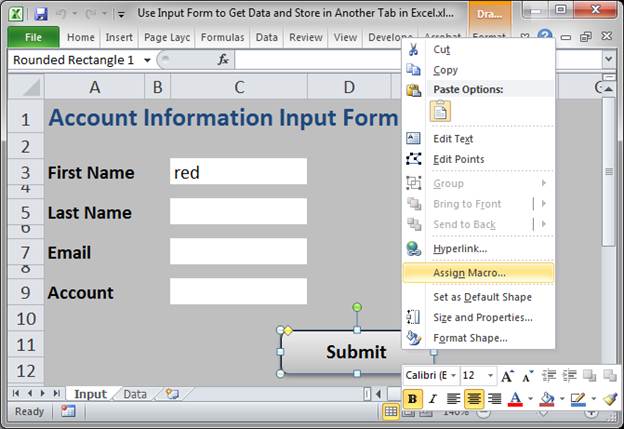
Select the macro from the list and click OK.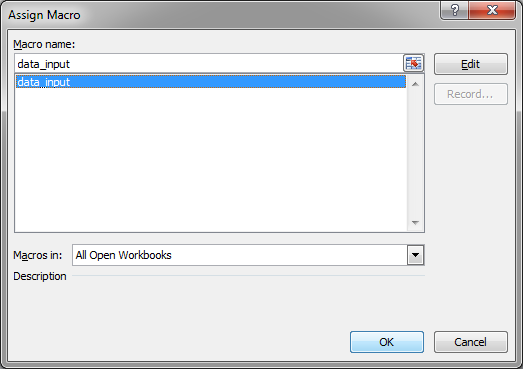
- It's time to test everything! Let's input some data.
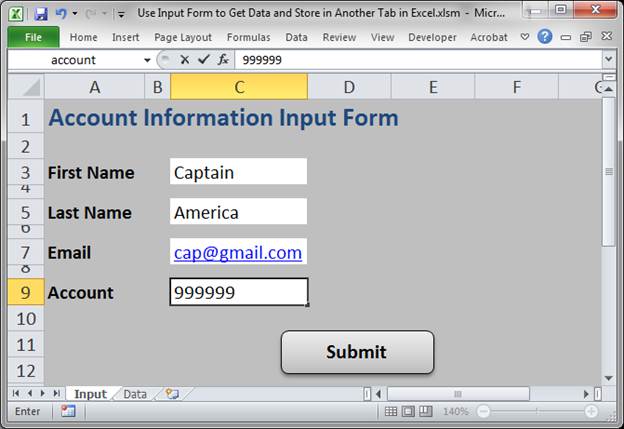
Click the Submit button, go to the Data tab, and you'll see the data.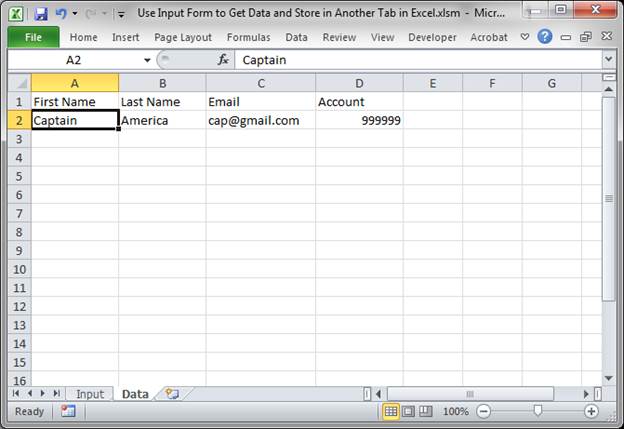
Whew, so that was a lot of steps, but you should now have a fully functioning Input form and data storage worksheet in Excel.
There are a number of other things you can add to the macro to make this a bit more user-friendly, such as clearing the form when a successful entry has been made, showing an output message that the data was stored, hiding and locking the Data worksheet so that a user can't easily change it by hand, and more. But, what I have shown you here is the creation of the core functionality of the Input form and storage system. Get this working first and then proceed to add those other features. I will also cover many of those features in other tutorials.
Full Macro
If you just want the macro that I made for this tutorial, here it is:
Sub data_input()
ws_output = "Data"
next_row = Sheets(ws_output).Range("A" & Rows.Count).End(xlUp).Offset(1).Row
Sheets(ws_output).Cells(next_row, 1).Value = Range("first_name").Value
 Sheets(ws_output).Cells(next_row, 2).Value = Range("last_name").Value
 Sheets(ws_output).Cells(next_row, 3).Value = Range("email").Value
 Sheets(ws_output).Cells(next_row, 4).Value = Range("account").Value
End Sub
If you want a better understanding of this macro, read the section above called Create the Macro to Store the Data.
Notes
Not much to say about this one that I haven't already said. I hope everything was clear and easy to understand but not too slow.
Make sure to download the workbook attached to this tutorial so you can get all of this in Excel (also, then you don't have to start from scratch when building your own input form).
Question? Ask it in our Excel Forum
Tutorial: You can enter data into a table in Excel using a form; here I'll show you how to do that....
Tutorial: How to highlight the rows of the top and bottom performers in a list of data. This allows...
Tutorial: How to get data from separate workbooks in Excel. This tutorial includes an example using ...
Tutorial: Formulas that you can use to get the value of the last non-empty cell in a range in Excel...
Tutorial: How to loop through a range of cells in a UDF, User Defined Function, in Excel. This is ...
Tutorial: Forms Course How to make a data entry form in Excel using VBA and Macros - this allows yo...


