Run a Macro when a User Does Something in the Workbook in Excel
How to run a macro when a user does something within the Workbook in Excel, such as opening a workbook, closing a workbook, and other activities that are not specific to a single worksheet.
As such, this tutorial differs from the Run a Macro when a User Does Something in the Worksheet in Excel tutorial.
In Excel, you can set macros to run when certain things, or events, happen. You can do this when things happen within a specific worksheet, as described in the tutorial above, or when things happen workbook-wide.
Here, I'll cover how to get a macro to run when something happens in the workbook and some sample events that are often used.
Sections:
Workbook Events - What they are and How to Use Them
How to Create a Workbook Event
Workbook Events - What they are and How to Use Them
A workbook event is something that allows you to run a macro when a specific thing happens in the workbook. For instance, if you want to run a macro when the workbook opens, you put a macro inside of the corresponding workbook event that runs when a workbook opens.
Workbook events are not specific to any worksheet, as are the worksheet events. However, workbook events can include events that happen within a worksheet, such as selecting a cell or changing the contents of a cell; but, since this is contained within the workbook event, it would run any time one of these events happened within any worksheet in the entire workbook. This may sound confusing, but the examples below should help explain everything.
How to Create a Workbook Event
Now, let's create a workbook event:
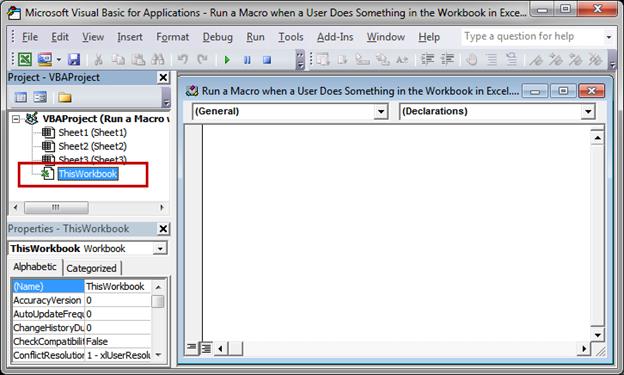
First, go to the VBA editor window (Alt + F11) and then double-click the thing that says ThisWorkbook in your project files.
In the window that opens, click the left drop-down menu and select Workbook
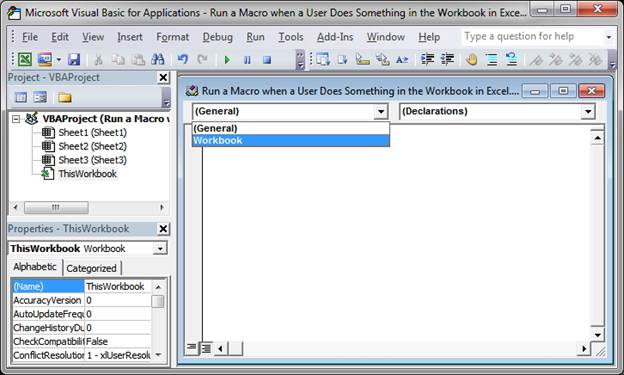
A default workbook event will fill-in by default, but you also have many options from which to choose if you click the right drop-down menu.

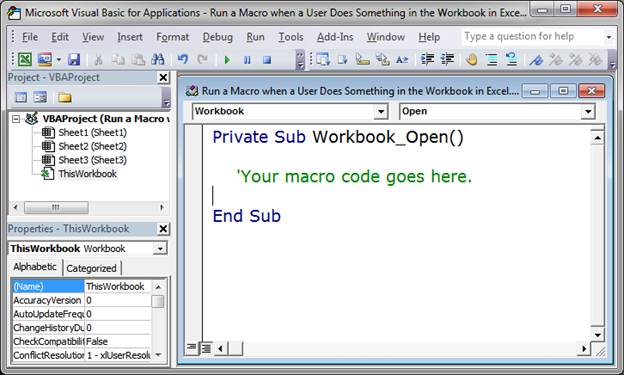
Once you choose an event, the event code will appear and you just put your macro code inside of it like this:
You can have as many different workbook events as you want for your workbook; just select another event from the drop-down menu on the right and the event code for that will appear.
Below, I will cover the most often used workbook events and explain what they mean and how they work.
Commonly Used Workbook Events
There are lots of workbook events that you can use but I'm going to cover the most widely used events here and tell you how to use them.
Some are easier to understand than others but I'll explain what you need to know to use them and this should prepare you to use any of the other events that are not covered here.
Workbook Open
This runs a macro right when the workbook is opened and before anything else happens.
Select Open from the menu. (This is also the default option that appears.)
Put whatever code you want to run when the workbook is opened in the middle like this:
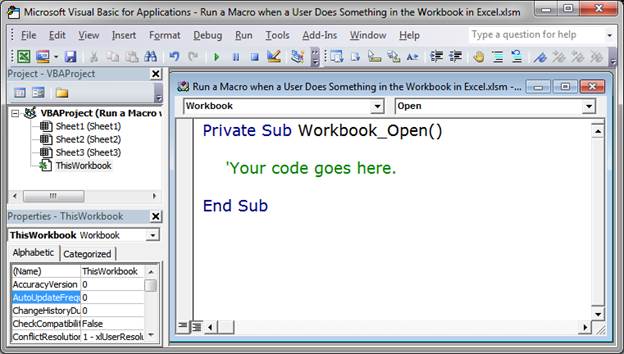
Note that this macro will not run automatically if the user has macros disabled. As such, you cannot rely on this code to always execute.
Workbook Before Close
This runs right before the workbook is closed. So, when the user closes the workbook, this will run before it is actually closed.
Select BeforeClose from the menu.
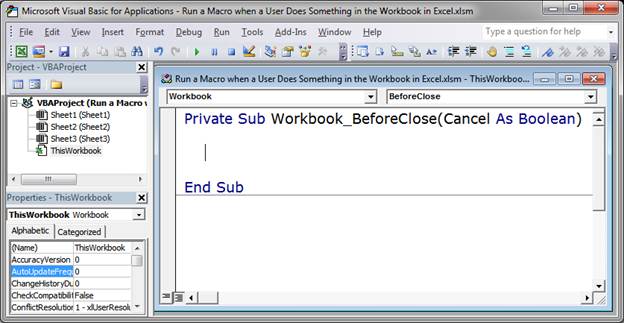
Put your code in the middle, as usual.
Notice the stuff within the parenthesis at the top: Cancel As Boolean
This means that a variable called Cancel will be automatically created. This variable is False by default.
The purpose of the Cancel variable is to allow you to stop the closing of the workbook. If you set Cancel equal to True then the workbook will cancel the closing process and the workbook will not be closed.
Workbook Before Save
This runs a macro right before the user saves the file. When the user clicks the save button, this macro will run before the actual file is saved.
Select BeforeSave from the drop-down menu on the right.
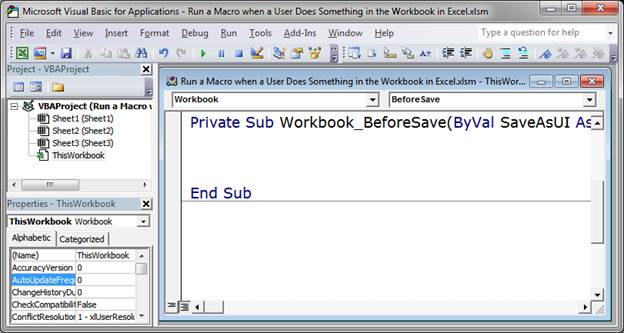
Put your code in the middle as usual.
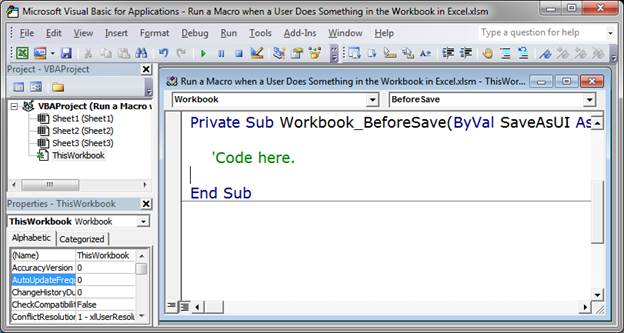
With this event, we have a couple things in the parenthesis:
ByVal SaveAsUI As Boolean, Cancel As Boolean
Here you can see it in the editor window split onto two lines:

There are two elements or variables SaveAsUI and Cancel.
SaveAsUI controls if the Save Changes dialog box should be displayed if there are any changes made that need to be saved. This can be set to True or False.
Cancel is False by default and controls if the workbook will be saved if any changes are made. If this is set to True, the workbook will not be saved. This allows for more control over whether the workbook will actually be saved or not.
Workbook Sheet Change
This runs when any cell in a worksheet is changed. This does NOT run when a cell is selected, only when it is changed.
Select SheetChange from the drop-down menu to get this.
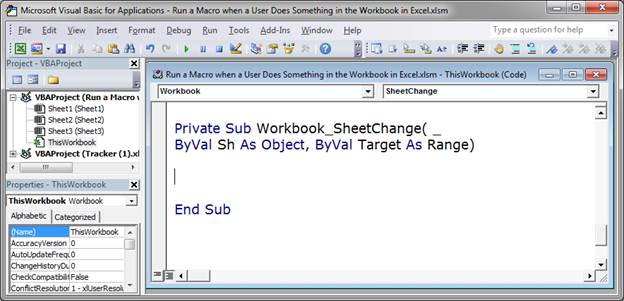
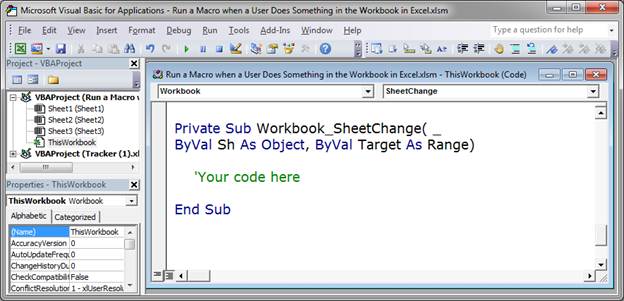
As usual, code goes in the middle:
There are two variables or parameters you can access in this event.
Sh is the worksheet where the event occurred and you can use that to get information about the worksheet.
Target is the cell that was changed. Use this to get info about the changed cell, including its new value.
These variables help to tell you what happened in the worksheet and they make working with this event much easier.
Workbook Sheet Selection Change
This runs any time a cell is selected within any worksheet in the workbook.
Select SheetSelectionChange from the drop-down menu to get this.
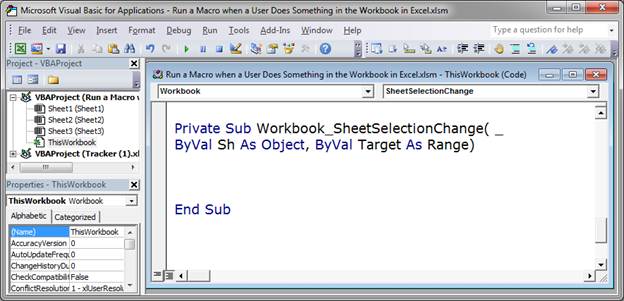
Put your code in the middle and you are good to go.
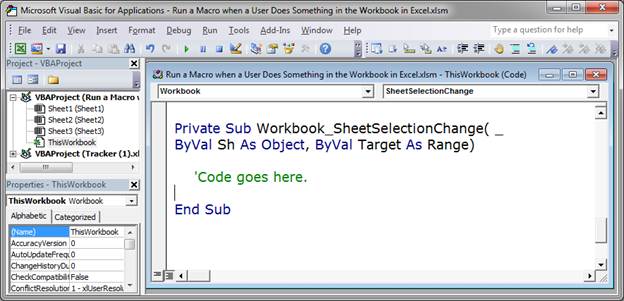
There are two variables or parameters that come with this:
Sh is the worksheet where the cell was selected.
Target is the cell or range of cells that were selected.
You can use both of these variables within the macro in order to know what worksheet the user is on and what cell or cells they have selected.
Notes
Workbook events allow you to make macros run automatically when a user does something in Excel. They allow you to add some magic to Excel that would otherwise be impossible or very difficult to implement.
Here, I've shown you what workbook events are and given you a few examples of particularly useful ones.
One tip for "seeing" the workbook event macros work is to output a simple message box when the event runs, something like Msgbox "Hi" is usually what I do.
Download the sample file for this tutorial and play around with the events. Once you start to see how they work, you will realize how useful they can be.
Question? Ask it in our Excel Forum
Excel VBA Course - From Beginner to Expert
200+ Video Lessons 50+ Hours of Instruction 200+ Excel Guides
Become a master of VBA and Macros in Excel and learn how to automate all of your tasks in Excel with this online course. (No VBA experience required.)
Tutorial: Run a macro in Excel when a specific cell is changed; this also covers when a cell within...
Tutorial: How to run a macro when a user does something in the worksheet, everything from selecting ...
Tutorial: How to make a macro run automatically after a workbook is opened and before anything els...
Tutorial: Make a macro run when you click a button in the worksheet in Excel. This allows you to cr...
Tutorial: Run a macro every 30 seconds, 1 minute, 10 minutes, 1 hour, etc.; this method allows you t...
Tutorial: Select a range in Excel from a UserForm and have that range input into the form so that yo...
Subscribe for Weekly Tutorials
BONUS: subscribe now to download our Top Tutorials Ebook!
Excel VBA Course - From Beginner to Expert
200+ Video Lessons
50+ Hours of Video
200+ Excel Guides
Become a master of VBA and Macros in Excel and learn how to automate all of your tasks in Excel with this online course. (No VBA experience required.)