Quickly Add, Edit, & Manage Business Specific Diagrams in Excel (SmartArt)
In this tutorial I am going to show you how to add, edit, and manage Business oriented diagrams, charts, and shapes to your Excel worksheet. This specifically deals with the SmartArt feature of Excel.
This feature is located on the Insert tab.

To add SmartArt just click the logo to bring up the SmartArt pop-up window.
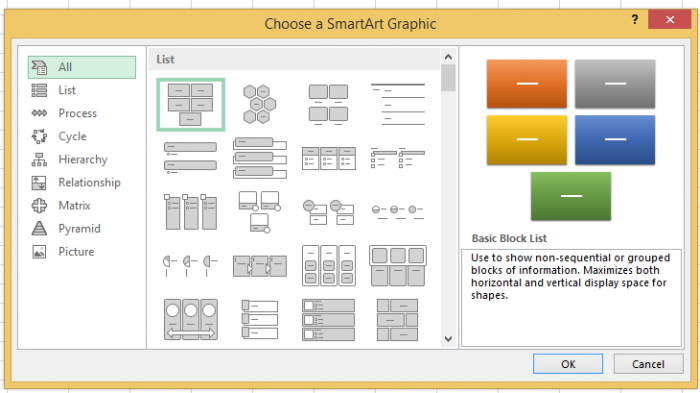
To insert a SmartArt object, just click on one of the SmartArt icons within the pop-up window and hit the OK button.
There are number of different options so I will just go through a few examples so that you are familiar with the concept. You can then play around with the other SmartArt objects and features from there.
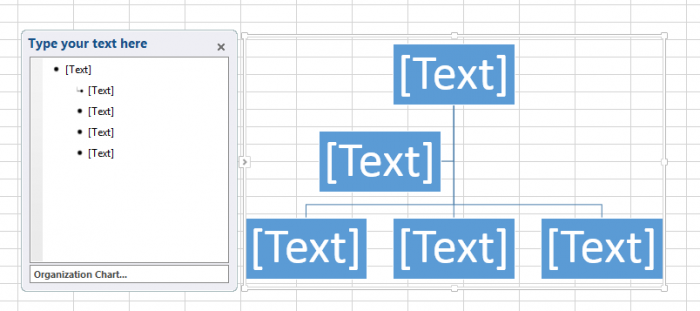
To start, I will look at an example from the Hierarchy options, the Organization Chart to be specific. This is what it looks like once you insert it into the worksheet:
Click on the SmartArt object and the Design and Format tabs will appear. These allow you to edit the layout and format of the overall chart and/or its individual elements. Just select the element you wish to edit and adjust the necessary features within the Design / Format tabs.
Add/Manage Elements within a SmartArt Object
To add and edit objects and shapes that are within a SmartArt object you use the Create Graphic section of the Design tab.

To add a shape just click the Add Shape button. To be more specific about where the new shape is to be added in, use the dropdown arrow beside the button and select an appropriate option.
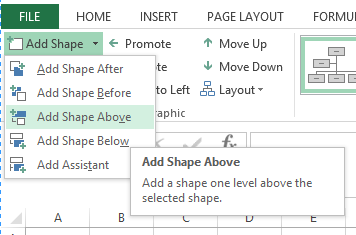
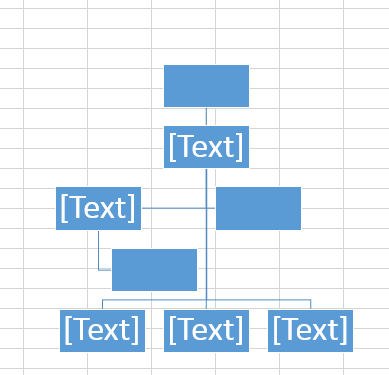
You can choose to add shapes before, after, below and above the current selection. You can also add a shape in as an assistant which places the shape beside the current one but separate from the main hierarchy. To demonstrate adding shapes I have selected the top shape and added a shape above it. I have then selected the left shape of the 3rd tier and added a shape below.
(this can be very confusing at first and you should play around with this feature in Excel until it makes sense to you - make sure to download the Excel file that accompanies this tutorial to follow along)
To remove a shape you simply select it and either hit the delete key or right-click then select Cut.
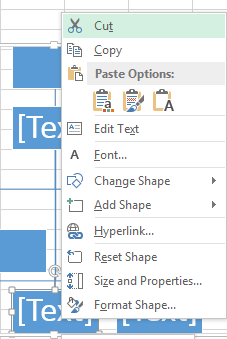
To demonstrate this I have deleted the middle shape from the bottom tier.

Adding Text to SmartArt Elements
To add text to a SmartArt shape, select the SmartArt first then select an individual shape and start typing.
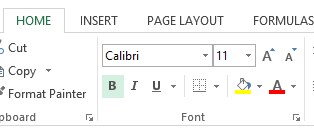
You can also edit the text formatting of a selected element from the Home tab Font section.
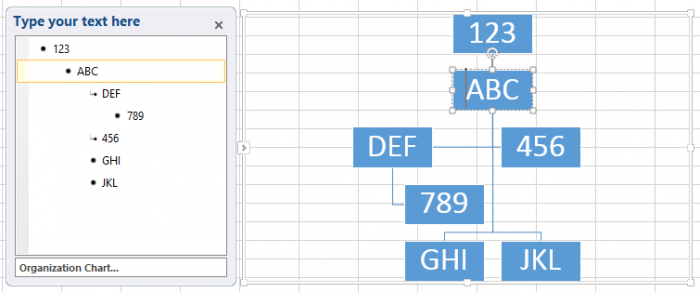
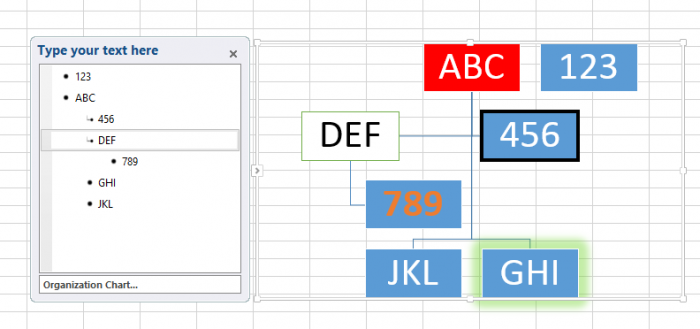
Alternatively you can edit the text from the menu on the left of the SmartArt. Now that text as been added to each of the shapes it will be easier to see the edit/rearrange functionality of SmartArt.
Moving Elements Around in SmartArt Objects
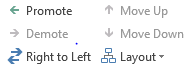
To move a shape up one tier, select it then click on the Promote button within the Create Graphics section of the Design tab.
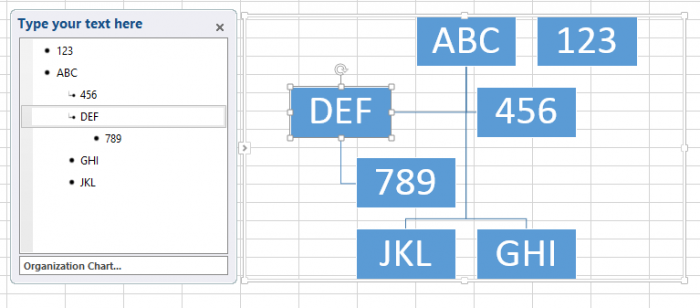
So for example I am going to promote the ABC shape to the same level as the 123 shape. The Demote button would do the reverse, moving a shape down a tier.
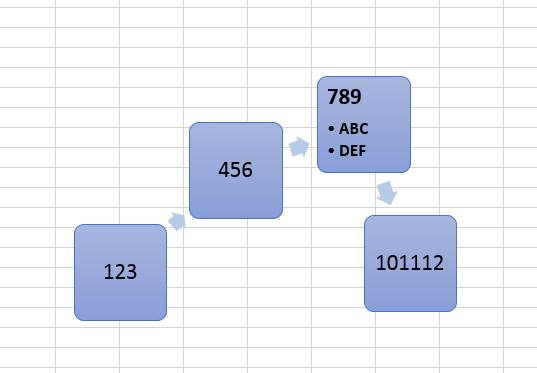
The Move Up and Move Down buttons change the order of the shapes within the selected tier. For example I am going to move the 456 shape up. This swaps its position from the right to the left as it is now above the DEF shape.

The Right to Left button doesnt affect the order of any of the shapes as such but swaps round how they appear. Currently my SmartArt appears from Left to Right so clicking on the Right to Left button will swap the chart round so that it appears from Right to Left.
SmartArt Formatting in Excel
All of the shapes within a SmartArt can be formatted like normal shapes. Just click on the SmartArt object then the Format tab.

Various shape fill, outline and effects can be applied from here. For text options use the Font section of the Home tab.
And here is the finished result of our little Organization Chart:
Other SmartArt Objects
The other SmartArts work exactly the same way. Another example is the simple block layout within the Lists section.
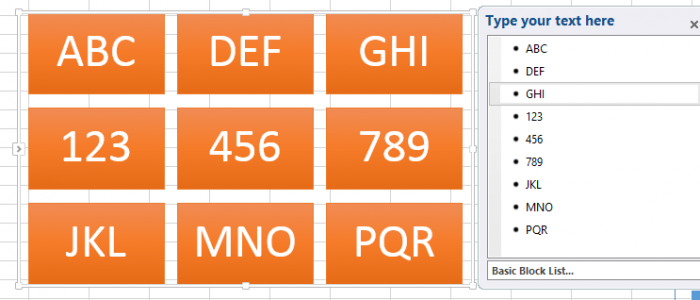
This SmartArt is the exact same as the organizational chart but without the concept of tiers/hierarchy so is in fact simpler to create/edit. A final example is the basic process SmartArt which is within the Processes section.
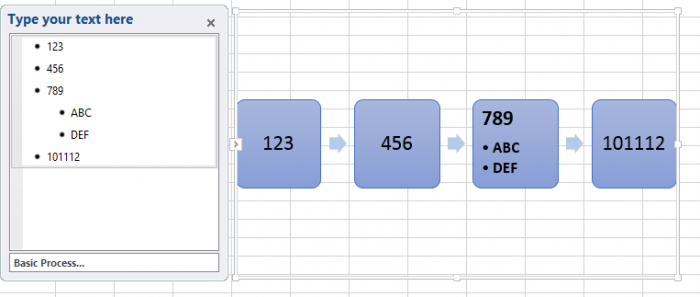
This is similar to the simple block layout but only in 1 big line and in a direction (indicative of a process).
Another thing to note about these 2 SmartArts is that they allow bullet points. You can use the Promote and Demote buttons to move bullet points to separate shapes or remove a shape and move its contents to the previous shape.
One final thing to note is that you can move and resize the shapes within a SmartArt like normal shapes. So for example I have moved the shapes around in the process SmartArt so that it now looks like this:
To do that, simply select the SmartArt object and click the desired elements within it that you want to move and drag them wherever you want them to be and everything else should follow accordingly.
SmartArt objects can be VERY useful. I suggest that you play around with this feature to find the right object and setup for your needs and then make it how you want it. It will take some time to get a pretty/desired look, but it can make a huge difference in your final product.
Download the Excel file used in this tutorial so you can see the final result for everything!
I hope this tutorial helped! :)
Question? Ask it in our Excel Forum
Excel VBA Course - From Beginner to Expert
200+ Video Lessons 50+ Hours of Instruction 200+ Excel Guides
Become a master of VBA and Macros in Excel and learn how to automate all of your tasks in Excel with this online course. (No VBA experience required.)
Tutorial: How to allow only certain people to edit certain cells or ranges in Excel. This is a sec...
Tutorial: In this tutorial I am going to introduce how to input, edit and manage excel formulas. To ...
Tutorial: Find if a cell or range of cells contains a specific value in Excel. This method can be us...
Tutorial: How to count cells that match text at the start or the end of a string in Excel. If you w...
Tutorial: How to quickly resize multiple columns and rows at once in Excel. This avoids having to...
Macro: Hide specific comments in Excel with this macro. Comments are still visible on hoveri...
Subscribe for Weekly Tutorials
BONUS: subscribe now to download our Top Tutorials Ebook!
Excel VBA Course - From Beginner to Expert
200+ Video Lessons
50+ Hours of Video
200+ Excel Guides
Become a master of VBA and Macros in Excel and learn how to automate all of your tasks in Excel with this online course. (No VBA experience required.)