Split Text into Multiple Cells in Excel
How to split text from one cell into multiple cells quickly and easily in Excel. This includes how to split names, part numbers, really anything you want. You can split the text based on spaces in the text, commas, periods, or anything you specify.
We will use the Text to Columns feature to do this.
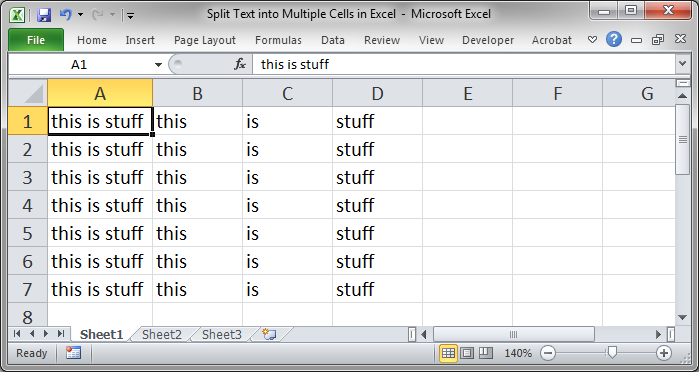
Desired Result:
Steps to Split Text into Multiple Cells
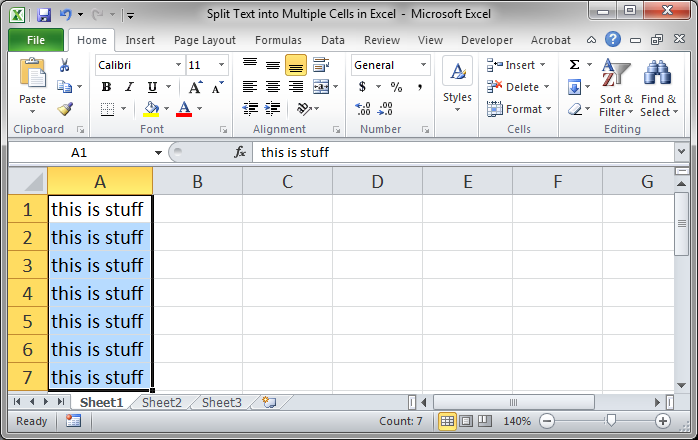
- Select the text or entire column of text that you want to split into multiple cells:
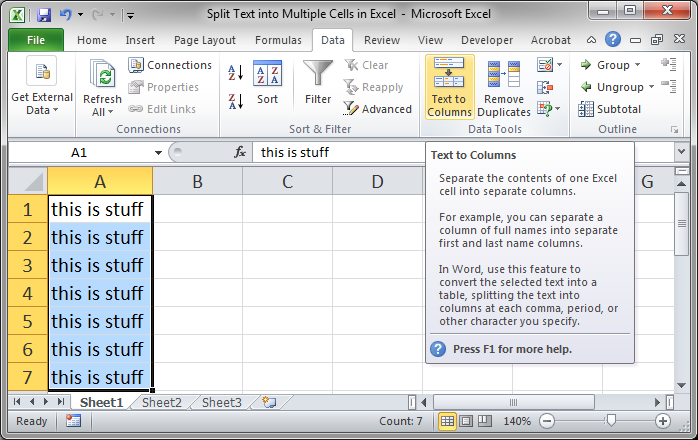
- Go to the Data tab and click the Text to Columns button:
- In the screen that opens up select either Delimited or Fixed width.Delimited means that there is a space or comma or something that you can use to separate the text; the delimiter will be used to determine how to break the text up into multiple cells. Fixed width means that you will select the break-points where the text in all of the cells will be split. Usually, you will want to select Delimited.
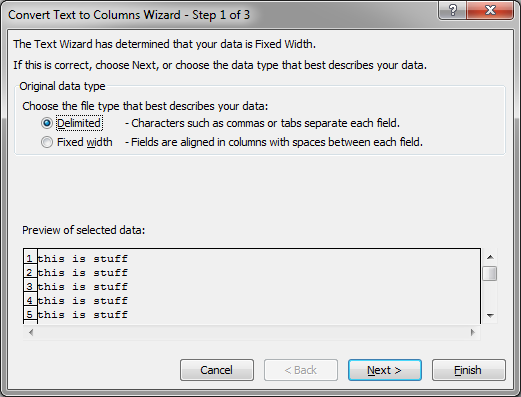
Once you have made your choice hit the Next button. - On this screen, you will choose what you want to use as the delimiter. Since a space is what separates our text into distinctive pieces, I choose the Space option. Choose whichever option you need or select Other and type in the delimiter that is used for your data.
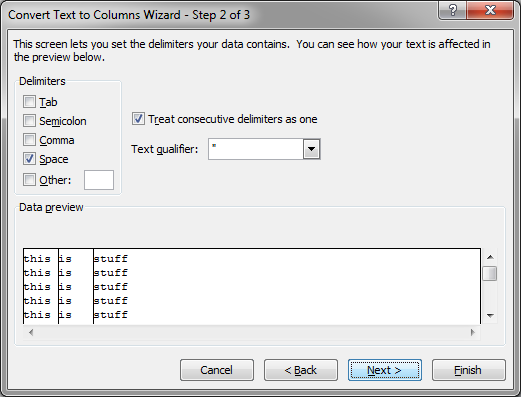
You will notice at the bottom of this screen a small preview window. This will show you how the text will be split based on the delimiter that you selected. If this does not look right, choose another delimiter until it does look right.
When finished here, hit the Next button. - Here, you can choose the format for the new data. You simply select the desired column at the bottom of the window and then change its format in the top left section for Column data format.
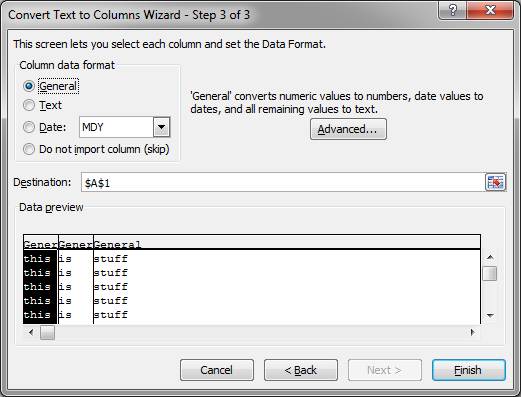
You can also change the destination for the new data in the Destination box. If you choose another location, the original data will be retained; otherwise, the original data will be overwritten.
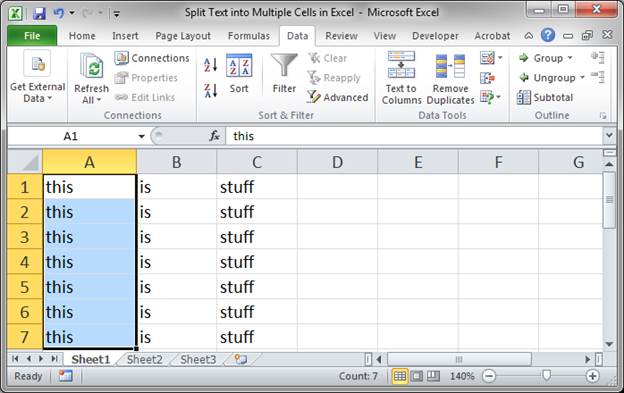
When you are finished here, hit the Finish button. - Here is the result:
If I changed the destination in step 5, we would retain the original data and it would look like this: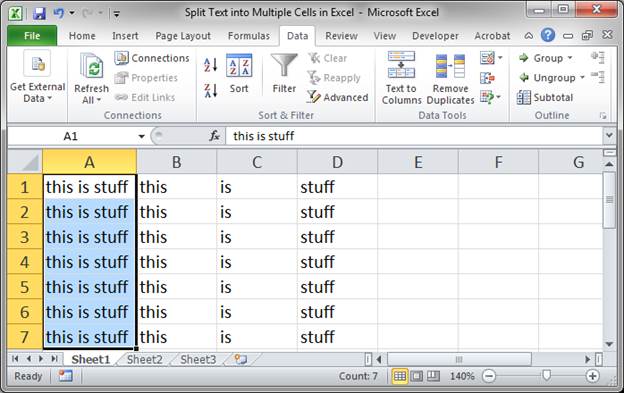
Notes
At any time in the steps above, you can click the Finish button and skip the other steps. If you do this, Excel will guess the other steps for you. Often Excel will get the results correct if you do this, but I would not always count on this to work if you have a new data set with which you have not previously worked.
Make sure to download the sample spreadsheet that accompanies this tutorial and try out this feature.
Question? Ask it in our Excel Forum
Excel VBA Course - From Beginner to Expert
200+ Video Lessons 50+ Hours of Instruction 200+ Excel Guides
Become a master of VBA and Macros in Excel and learn how to automate all of your tasks in Excel with this online course. (No VBA experience required.)
Tutorial: How to center a title across multiple cells in Excel in order to make good looking titles...
Tutorial: There are two easy ways to combine values from multiple cells in Excel. In order to do thi...
Tutorial: How to use VBA/Macros to iterate through each cell in a range, either a row, a column, or ...
Tutorial: In this tutorial I am going to look at cell alignment / arrangement. These features allow ...
Tutorial: In the previous tutorial I talked about the Redo button in Excel and how using Ctrl + Y ca...
Tutorial: Convert a column of data into multiple rows of data at a given interval. For instance, e...
Subscribe for Weekly Tutorials
BONUS: subscribe now to download our Top Tutorials Ebook!
Excel VBA Course - From Beginner to Expert
200+ Video Lessons
50+ Hours of Video
200+ Excel Guides
Become a master of VBA and Macros in Excel and learn how to automate all of your tasks in Excel with this online course. (No VBA experience required.)