OFFSET Function in Excel
The OFFSET function in Excel returns a cell or range reference that is a specified number of rows and columns away from a particular cell. You can also specify how large the returned range reference will be.
This can sound confusing so let's look at an example:
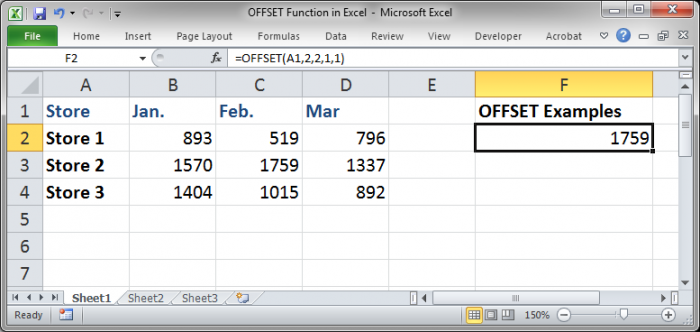
Here I used the OFFSET function to return 1759, the value in cell C3, while using cell A1 as my reference point.
Here is how I did it using the OFFSET function:
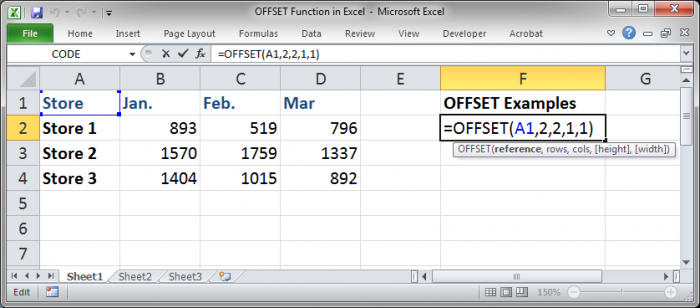
You can see that the only cell that was referenced was A1 and I used the other arguments of the function to navigate to or "offset" to another cell reference.
Remember that the OFFSET function does NOT move any cells, it merely references them.
Now, let's look at the syntax of the function.
Syntax
OFFSET(reference, rows, cols, [height], [width])
The offset function has a lot of arguments but they are all very simple.
Reference: This is the location of the cell that we want to use as a base-point or reference for the rest of the offset function. When you tell the function to move to the right or down or left or up, you are telling it to do so from this point.
Rows: This is how many rows down or up from the reference cell you want to go. This must be a number and it can be negative, to go above the reference cell, positive, to go below the reference cell, or zero, to stay in the same row as the reference cell.
Cols: This is how many columns to the right or left from the reference cell that you want to go. This must be a number and can be negative, to go to the left of the reference cell, positive, to go to the right of the reference cell, or zero, to stay in the same column as the reference cell.
Height: This is an optional argument and it means how high the range reference should be. Remember, the OFFSET function returns a cell or a range. If you leave this empty or just put a 1 in there, the range reference will be only 1 cell high - if you also put a 1 in for the width argument, or leave it empty, it will cause a single cell to be returned instead of a range reference (as shown in the example above).
Width: This is an optional argument and it means how wide the range reference should be. Remember, the OFFSET function returns a cell or a range reference. If you leave this empty or just put a 1 in here, the range reference will be only 1 cell wide - also putting a 1 in for the height argument, or leaving it empty, will cause a single cell to be returned instead of a range reference (as shown in the example above).
More Examples
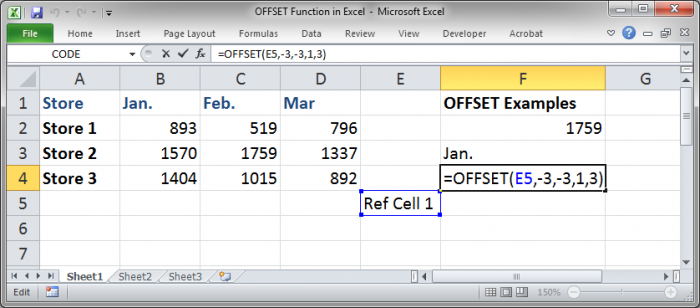
Now, I will use another cell as the reference and show you how to go up and to the left:
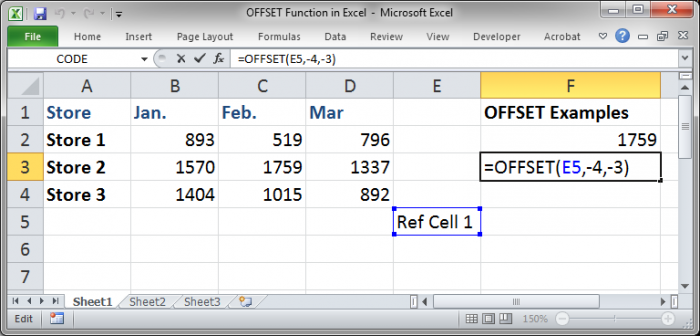
I used the Ref Cell 1 as the reference cell, and I made the OFFSET function go 4 rows up and 3 columns back. Note that I did not even use the height and width arguments since they are optional and I only want to return a single cell.
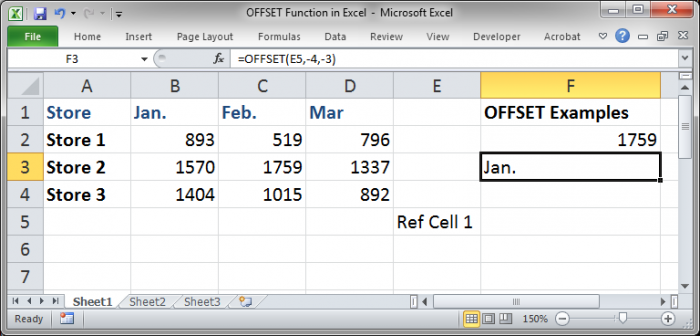
As you can see, this returns the contents of cell B1, which is simply "Jan."
Now, let's work on a useful example where we return a range of cells instead of just a single cell. The function will work just the same as before except that we will enter numbers greater than 1 for the height and width arguments.
Here, the function should return a range that is B2:D2.
However, we cannot return a range to a cell in Excel, so, once I hit Enter this is the result:
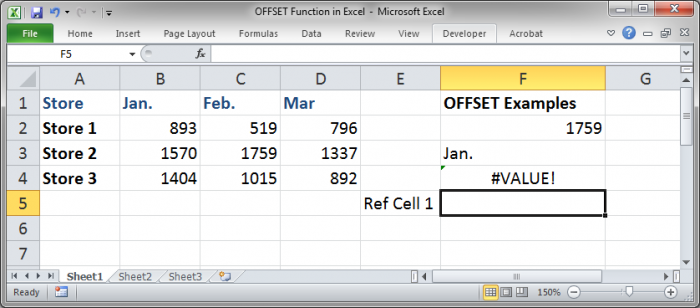
We get a #VALUE! error.
This makes this function seem all the more useless until we make more complex formulas and put the OFFSET function inside of them.
More Advanced Examples
The power of the OFFSET function comes when you put it inside of other functions in Excel. Remember that this function returns a cell or a range reference and so we can put it in other functions any place where you can put a cell or a range reference.
Let's follow the last example now but put the OFFSET function inside of a SUM function.
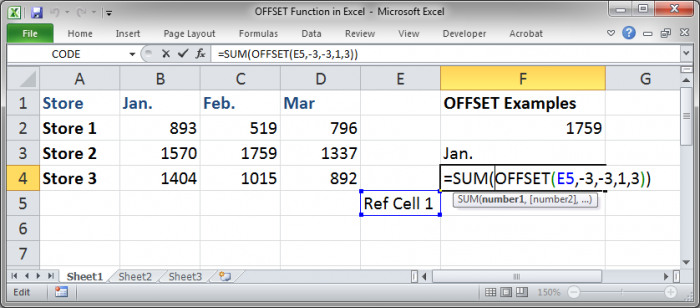
This is called a nested function because there is one function inside of another.
Since the OFFSET function returns a range reference here, and the SUM function needs a range reference for its argument, this works perfectly:
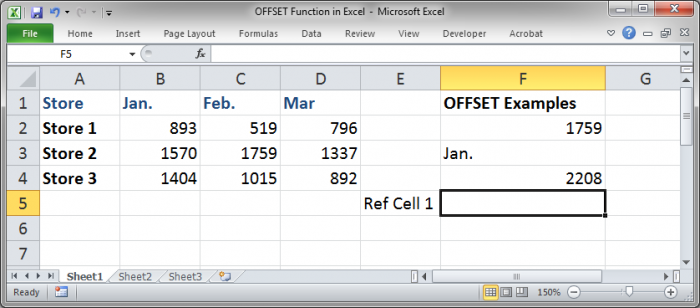
The OFFSET function returned the range reference B2:D2 and the SUM function took that and summed it to get 2208.
Dynamic Formula using OFFSET
Now, let's create a dynamic formula that will always sum the data in the column, even when you add new data to it.
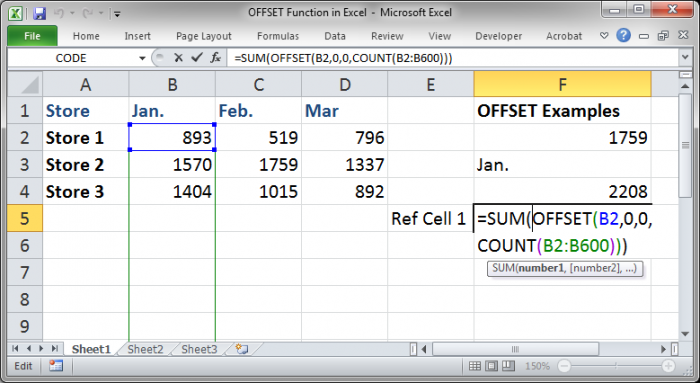
You can see that we now have a COUNT function inside of an OFFSET function inside a SUM function. This will allow it to update for new numbers added to column B.
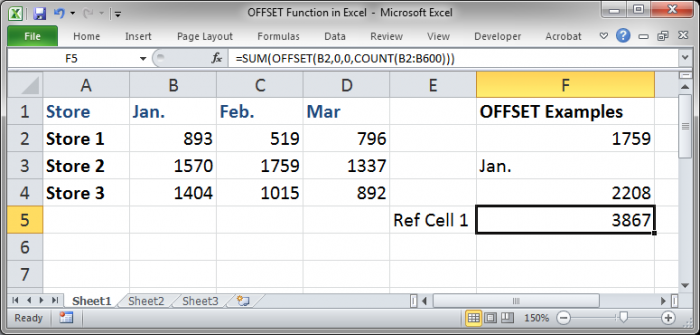
Add data to column B:

You can see that the new number has been added to the rest in column B.
The formula that I used is this:
=SUM(OFFSET(B2,0,0,COUNT(B2:B600)))
We have the SUM and OFFSET functions like before, but, this time, I used a COUNT function to determine the height argument for the OFFSET function.
COUNT() will count the number of cells within the range B2:B600 that have numbers in them. Make this range as large as you need to capture future additions to the list or simply reference the entire column using B:B if you are in Excel 2007 or later.
Since the reference cell used in the OFFSET function is B2 and the offset, values for the rows and cols arguments, is zero, the only thing that will change is the height of the range.
Basically this means that the OFFSET function combined with the COUNT function will return the range B2:B5 for the last example and B2:B4 for the example before I added the number 1000 to cell B5.
This is an example of the OFFSET function returning a range that starts with the reference cell instead of returning a cell or range reference far away from the reference cell.
Another great example of using the OFFSET function is to create dynamic named ranges.
As you can see, this function can be quite useful once you start to build more complex formulas in Excel. It is well worth it to memorize how to use this function because it will certainly save you time at some point in the future.
Make sure to download the spreadsheet used in this tutorial so you can see and work with all of the examples shown above.
Question? Ask it in our Excel Forum
Excel VBA Course - From Beginner to Expert
200+ Video Lessons 50+ Hours of Instruction 200+ Excel Guides
Become a master of VBA and Macros in Excel and learn how to automate all of your tasks in Excel with this online course. (No VBA experience required.)
Tutorial: In this tutorial I will cover the basic concepts of Formulas and Functions in Excel. A for...
Tutorial: How to create a custom worksheet function in Excel. These are called User Defined Function...
Macro: Determine if a cell in Excel contains a formula or function with this UDF (user defined fu...
Tutorial: Full explanation of the Vlookup function in Excel, what it is, how to use it, and when yo...
Tutorial: In this tutorial I am going to show you how to easily input complex Functions in Excel. To...
Tutorial: The differences between FIND() and SEARCH() and when to use these functions in Excel - th...
Subscribe for Weekly Tutorials
BONUS: subscribe now to download our Top Tutorials Ebook!
Excel VBA Course - From Beginner to Expert
200+ Video Lessons
50+ Hours of Video
200+ Excel Guides
Become a master of VBA and Macros in Excel and learn how to automate all of your tasks in Excel with this online course. (No VBA experience required.)