
")
Subscribe for Weekly Tutorials
BONUS: subscribe now to download our Top Tutorials Ebook!
How to Add Formatting to Cells and Data in Excel Styles, Fonts, Colors, & More
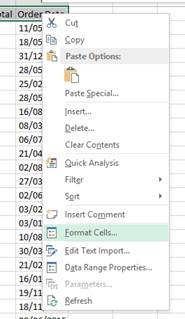
In this tutorial I will cover how to use the various formatting tools in Excel. The Formatting tools are located on the Home tab/ribbon (for versions prior to 2007 formatting is accessed by right clicking and selecting Format Cells):

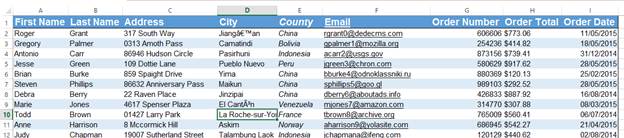
To demonstrate the various formatting options I am going to edit this basic table of sales orders:
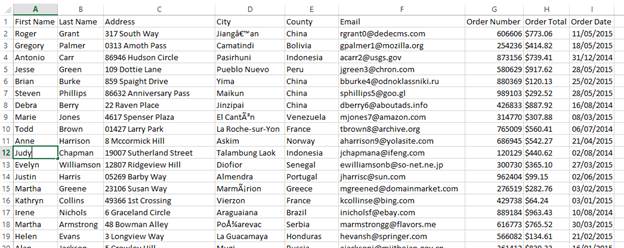
First I am going to edit the column headings of my table. I start by highlighting these cells.

I then go to the Font settings on the Home tab.
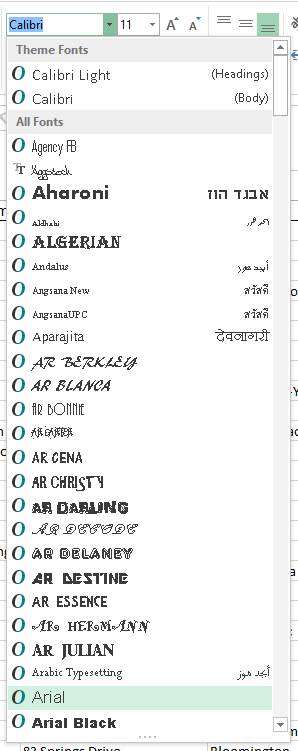
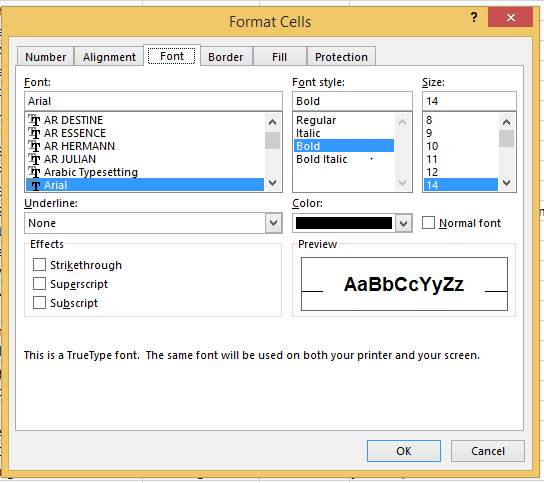
(For versions of Excel prior to 2007 the Font options are accessed from the Font tab of the Format Cells pop up window)
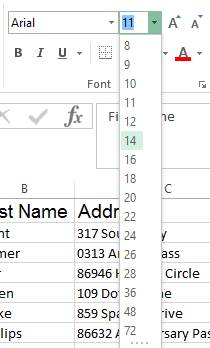
The text dropdown on the left selects the text type. The dropdown shows the various font names and how they look. For this example I am changing my column headings to have the Arial font type.
The next dropdown contains numbers. This allows you to select the size of the font. I have decided to increase the size of my text to 14. Note: The two buttons beside this dropdown also allow you to increase/decrease the size.

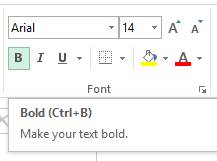
I am also going to make my text for the column headings bold. This is done by clicking the Bold button which is symbolized by a bold B. (Ctrl + B is the keyboard shortcut)
Alternatively I could have made the column headings italic (I button) and/or underlined (U button). The buttons for these are just beside the Bold button.

The last formatting changes I make to my table are adjusting the cell and text colors. The button with a bucket on it changes the cell color and the button with a capital A on it changes the text color. The down arrow beside each button brings up the color picker. You select your color from here then click the button to apply to your current selection.

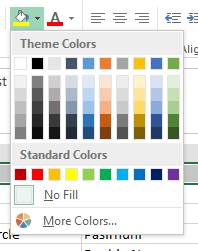
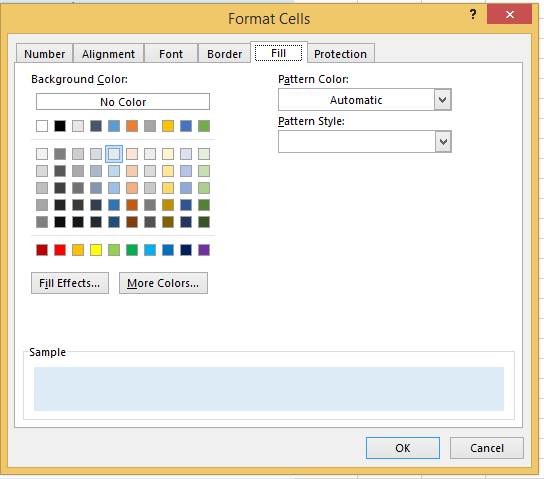
Note: For Excel versions prior to 2007 the cell color options are located on the Fill tab of the Format Cells window.
I have decided to make my column headers dark blue with white text and then the rest of the table alternates between white and light blue for each row. I have also added a border to my table (by clicking the window like symbol in the middle.

The end result is a much better looking table which is easier to read:
An alternative way to adjust all these styling options at once is to use Styles (only Excel versions 2007 and later). Styles is a section on the Home tab.
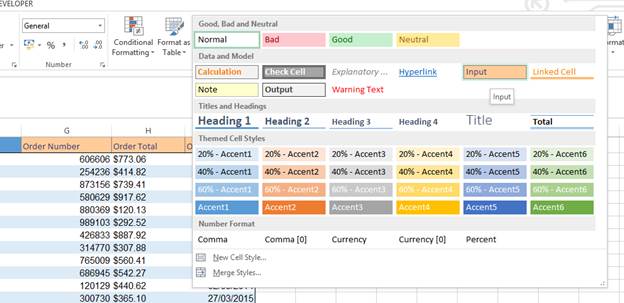
You click the dropdown arrow to expand the styles selection. Once youve found a style you like, just click it and your selection will be formatted to that style. You can also add styles by clicking the New Cell Style button. What I could do here is create a few new styles from my table so that I can re-use the formatting on future tables.
Note: Accompanying Excel has Unformatted and Formatted sheets so you can see the difference between the 2. I encourage you to play around with the styling until you find a style that suits you.