Get Data from the Worksheet into a Macro in Excel
Here, you'll learn how to get information from the Excel worksheet into a macro so you can do something with it.
One of the most important things with macros is getting information from the user, and the most often used method is to get it from a cell in the worksheet.
There are two steps required to do this: reference a cell that contains the data that you want and get that data.
Sections:
Quick Example
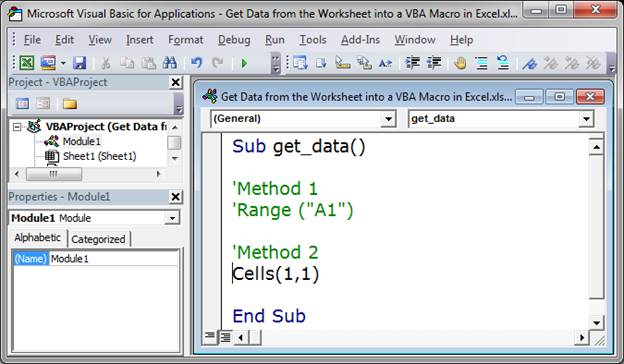
For all who may be impatient or not need a full explanation, here is the final code with the methods for getting data from a cell:
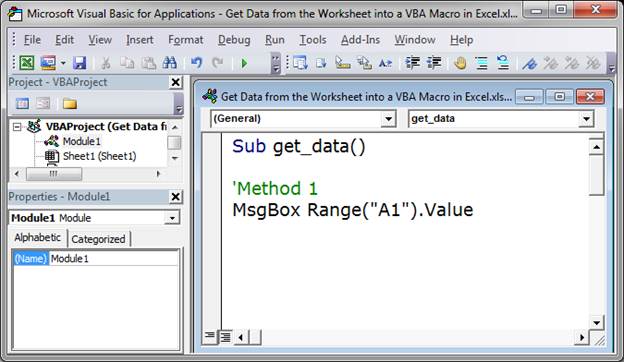
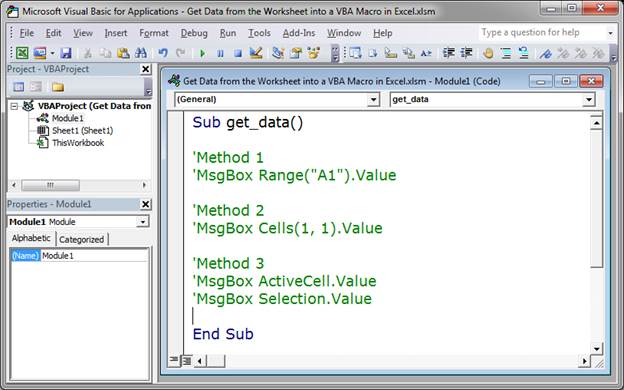
Sub get_data()
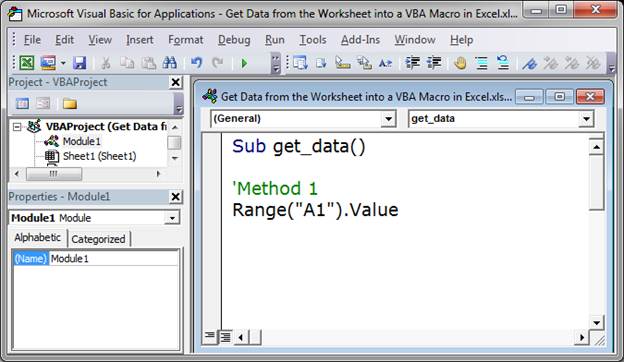
'Method 1
Range("A1").Value
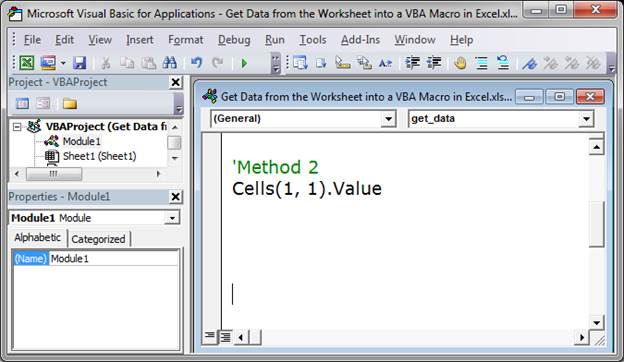
'Method 2
Cells(1, 1).Value
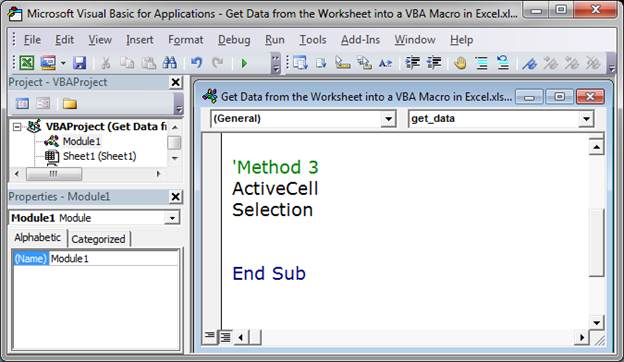
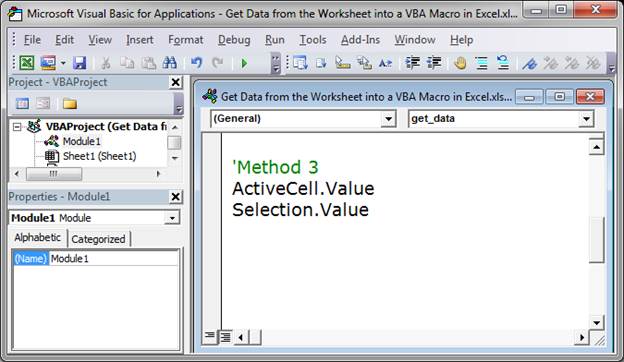
'Method 3
ActiveCell.Value
Selection.Value
End Sub
How to Reference a Cell
This can be the hardest part because we don't always know where the desired cell will be located.
This tutorial will keep it simple and show you three ways to reference a cell, two of them will be when you know the location of the cell and the third will be the cell that the user selects.
Method 1 - Know Location of the Cell (Easiest Method)
Range(cell_reference)
Cell_reference is simply the location of the cell.
To select cell A1, you type: Range("A1")

This is the easiest way to input the location of a cell because it's easy to read and input, you just type the location of the desired cell within Range() and that's it.
Make sure to include double quotation marks around the range reference.
If you wanted to reference cell B5, you would type: Range("B5")
You can also select a range like this (more on this in a later tutorial): Range("A1:C5")
Method 2 - Know Location of the Cell (More Complex Method)
Cells(row_number, column_number)
Row_number is the row number of the desired cell and column_number is the column number of the desired cell.
This is more complex and less intuitive compared with the last method but it is very important to learn it because you will, very soon, have to use this method to do more complex but very useful operations in macros.
To select cell A1, we would do this: Cells(1,1)
Cells(1,1) means cell A1 because A is the first column and 1 is the first row.
The column number starts with column A at 1 and increases by one for each column to the right; rows work the same way but going down.
To reference cell B5, we would input this: Cells(5,2) because B is column 2 and 5 is row 5.
I won't show you how to reference a range using this method here because it can get confusing quickly, but a later tutorial will explain it.
Method 3 - Use the Location of the Currently Selected Cell
Selection or ActiveCell
These methods will get data from the currently selected cell within the worksheet.
Either type Selection or type ActiveCell. There is a difference between these two methods, but it doesn't matter for this tutorial.
Now that you know a few simple ways to reference cells, let's get the data.
Get the Data
This is simple, just put .Value after the cell reference.
Using Range, it looks like this:
Using Cells, it looks like this:
Using Selection or ActiveCell, it looks like this:
Testing Your Macro
If you run the above macros, you won't see anything that shows you that you did it right. To see the data, just output it into a pop-up window in Excel by placing MsgBox in front of the cell reference like this:
If I run the macro now, a window will open that shows me the data that is in cell A1.
I have gone ahead and put MsgBox in front of each line in the sample file attached to this tutorial and commented them out, just remove the single apostrophe from the example that you want to use and customize it from there. (If the line is green, it means that it is commented-out and that code will not execute in the macro.)
Notes
If you didn't understand something in this tutorial, make sure you have read the first tutorial in the series: What is a Macro in Excel
Also, don't forget to download the sample file for this tutorial; it includes the code that we created in this tutorial and you can download it and play around with it as you like.
Question? Ask it in our Excel Forum
Excel VBA Course - From Beginner to Expert
200+ Video Lessons 50+ Hours of Instruction 200+ Excel Guides
Become a master of VBA and Macros in Excel and learn how to automate all of your tasks in Excel with this online course. (No VBA experience required.)
Tutorial: How to input data into cells in a worksheet from a macro. Once you have data in your macro...
Tutorial: In this tutorial I am going to show you how to update, change and manage the data used by ...
Tutorial: Select data from other worksheets with Macros and VBA without navigating to those workshee...
Macro: Import data from the web into Excel with this macro. This is a basic web query macro that ...
Tutorial: How to change the name of a chart in Excel. This allows you to use a more intuitive char...
Tutorial: You can enter data into a table in Excel using a form; here I'll show you how to do that....
Subscribe for Weekly Tutorials
BONUS: subscribe now to download our Top Tutorials Ebook!
Excel VBA Course - From Beginner to Expert
200+ Video Lessons
50+ Hours of Video
200+ Excel Guides
Become a master of VBA and Macros in Excel and learn how to automate all of your tasks in Excel with this online course. (No VBA experience required.)