")

Subscribe for Weekly Tutorials
BONUS: subscribe now to download our Top Tutorials Ebook!
Find the Next Blank Row with VBA Macros in Excel
Learn how to find the next empty cell in a range in Excel using VBA and Macros. This method will skip any blanks that are between your data but not at the very end of it.
Look at this example:
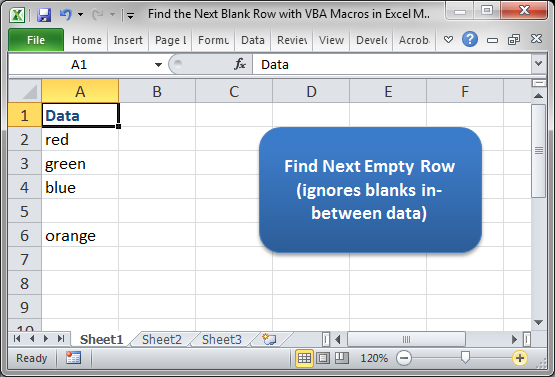
We want the VBA to locate cell C7 and NOT cell C5.
The VBA to do this is quite simple:
Sub Find_Next_Empty_Row()

'selects the next empty row
'ignores blanks inbetween the data set

Range("A" & Rows.Count).End(xlUp).Offset(1).Select

End Sub
There are two comments in there and only one actual line of code:
Range("A" & Rows.Count).End(xlUp).Offset(1).Select
This is where the magic happens and now Ill explain it.
The A is the column where we want to get the next usable blank cell. So, if we wanted to check for the next cell in column D then you change the A to a D.
The Rows.Count part just counts how many rows are in Excel and adds them there so that it will not miss any rows when checking for blank ones. This is important since the row count in Excel changed from version 2003 to 2007, and so this makes the code a bit more versatile.
The End(xlUp) part tells Excel to return the first cell with data that it finds when lookup up the worksheet starting at the last row in the worksheet.
So far, this will find the last cell that has data in it in the column, but we need to get the very next, or empty, cell and this is what Offset(1) does for us. The 1 tells Offset how many rows it should offset and since we want the very next row, 1 works for us.
After that, we can do whatever we want with this cell. At this point, Excel knows where we are talking about. In this example, I used a simple Select to select the empty cell so you can verify that the code works but, like I said, you can do anything here; you dont have to actually select the cell first.
This is a very versatile piece of code and it should help save you a lot of time.
Make sure to download the Excel file for this tutorial so you can see the macro in action and play around with it.
I hope this was helpful! :)