")

Subscribe for Weekly Tutorials
BONUS: subscribe now to download our Top Tutorials Ebook!
Add Values to a ListBox
How to fill a Listbox with values in a UserForm.
By default, a Listbox in a form will be empty, and we need to use some VBA code to fill it with values that the user can then select.
Sections:
Where to Add Items for the ListBox
Add Values to ListBox - Method 1
Add Values to ListBox - Method 2
Add Values to ListBox - Method 3
Where to Add Items for the ListBox
To add items to a ListBox using Method 2 and Method 3 below, we have to use some VBA code and this code must go within the UserForm. Skip this section if you want to store the list in a worksheet in Excel and use Method 1.
Go to the VBA window (Alt + F11) and make sure you are viewing the Project window (Ctrl + R).
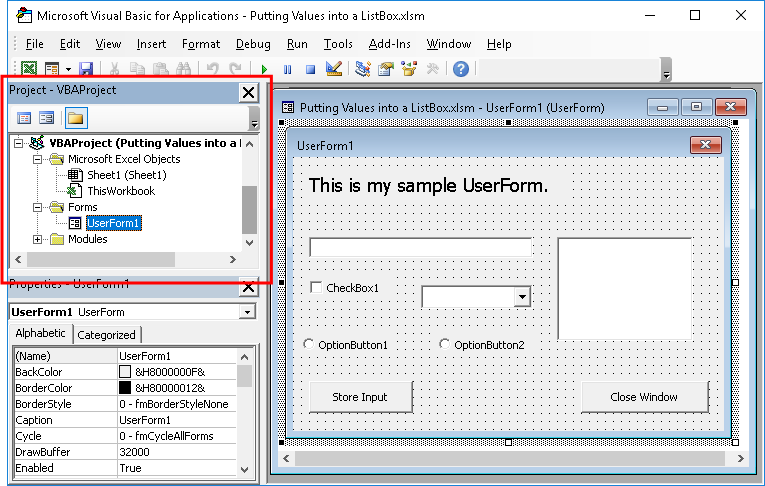
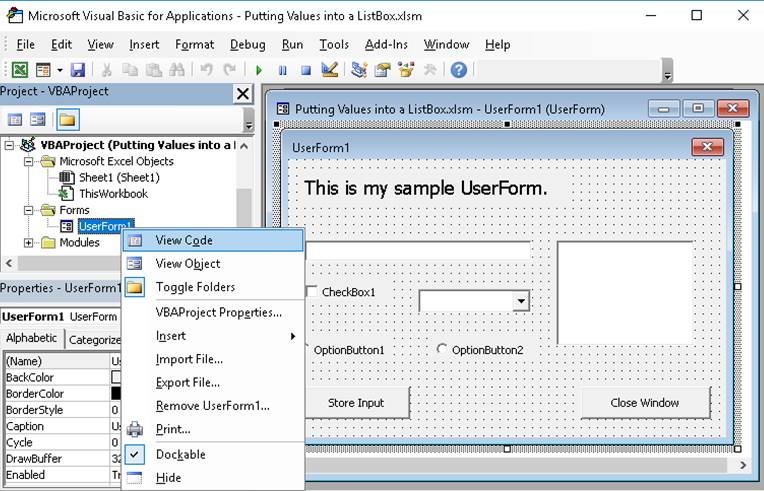
Right-click over the desired UserForm and click View Code.
In the window that opens, select UserForm from the left drop-down menu and Initialize from the right drop-down menu.
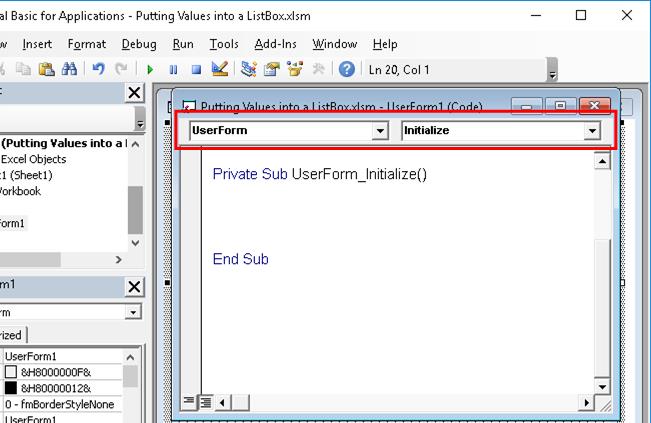
Once you do this, you will see the code section UserForm_Initialize() like in the above image.
This is where the code goes, inbetween the two lines of code above.
The reason the code goes here is because this is the code that will run when the UserForm starts-up or opens and we want the ListBox to be filled with the desired values immediately when the form opens.
Add Values to ListBox - Method 1
Simple and requires no coding.
We create this list from a range of values in Excel. There is no coding required, so we don't need to use any VBA or go to the Code window like in the last section.
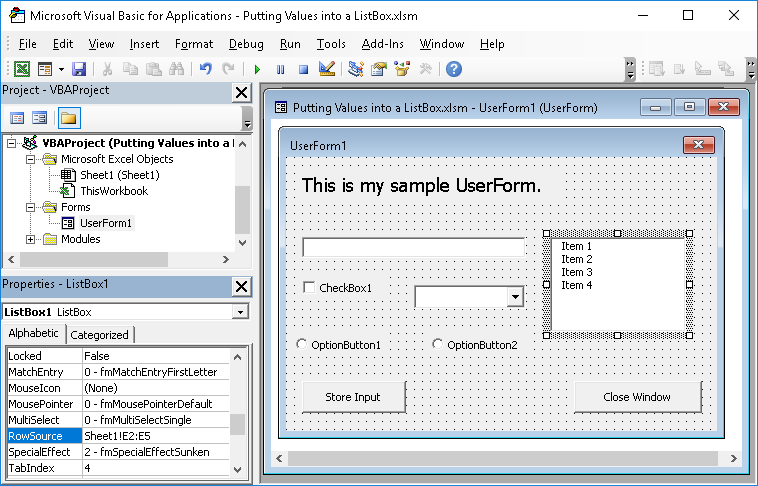
Go to the VBA window (Alt + F11) > double-click the UserForm from the Project window (Ctrl + R if it's not visible) and then, once the form is visible, click the ListBox that you want to fill with values.
Look to the Properties window and scroll down to RowSource. If the Property window isn't visible, hit F4.
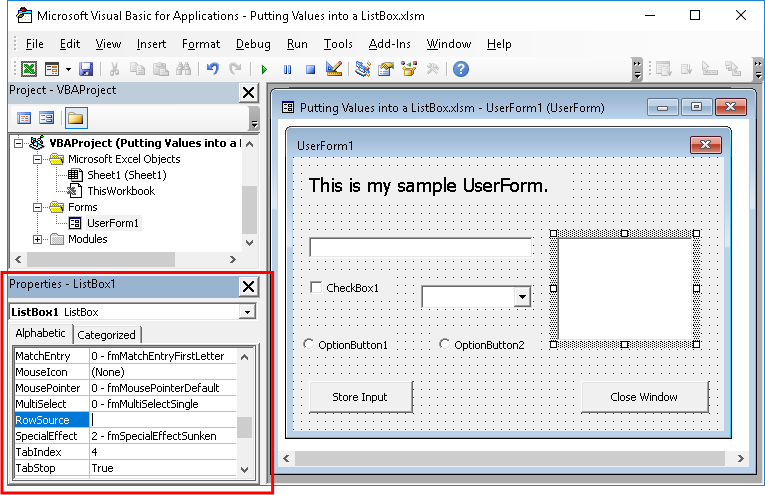
In there, enter the sheet and range reference to the list of data.
It is a good idea to include the sheet reference infront of the range, otherwise the ListBox will assume the range is from the worksheet that you were on when you launched the UserForm.
In my example, the list is on sheet 1 in range E2 to E5: Sheet1!E2:E5
Once you enter this, you will know if you did it correctly because your ListBox will automatically fill with the list while in design mode.
This is a very easy way to make and maintain a list for a ListBox in Excel.
Tip: if you don't want the user to be able to see or change this list, put it on a hidden worksheet.
Add Values to ListBox - Method 2
Simple. Good for small lists. Requires VBA code - first section above explains where to put this.
With ListBox1
    .AddItem "Item 1"
    .AddItem "Item 2"
    .AddItem "Item 3"
    .AddItem "Item 4"
End With
ListBox1 is the name of the ListBox that we want to populate with data. The name of the ListBox is found in the Properties window at the top and is called (Name).
.AddItem is what adds the value to the ListBox.
Whatever you put inbetween the quotation marks after AddItem is what will be added to the list.
This method is cumbersome if you have a large list, but it is probably the most intuitive and easiest to understand.
Add Values to ListBox - Method 3
More advanced, but not too difficult. Better for larger lists of items. Requires VBA code - first section above explains where to put this.
ListBox1.List = Array("Item 1", "Item 2", "Item 3", "Item 4")ListBox1 is the name of the ListBox that we will fill with values. The name of the ListBox is found in the Properties window at the top and is called (Name).
.List adds the items from the array.
Array is the function that is used to create an array of the items for the list. If this seems confusing, don't worry about it, just follow the syntax from the example above.
Note on Array Creation
This example uses an array to fill the list. There are many ways to create an array and some work better than others for long lists.
Here is an example that works like the last one, just with a little extra code so that we can build the array in a more visually intuitive manner, hopefully.
'Put values into an array
myArray = Split("Item 1;Item 2;Item 3;Item 4", ";")

'Add the array to the ListBox
ListBox1.List = myArray
We use the Split function to turn the values in the parenthesis into an array and we use a semi-colon to separate each item in the list.
The highlight of this version is that you don't have to put quotation marks around every single item.
Notes
As you can see, there are a number of ways to add a list to a ListBox. Choose whichever method works best for you!
Make sure to download the sample file for this tutorial to see these examples in Excel - note that the examples with code have been commented-out, simply remove the comment (single quotation mark) from the lines with the code to test out those methods.