Subscribe for Weekly Tutorials
BONUS: subscribe now to download our Top Tutorials Ebook!
Make a UserForm in Excel
Let's create a working UserForm in Excel.
This is a step-by-step tutorial that shows you everything you need to do to design, build, run, open, and close a basic UserForm in Excel. After reading this tutorial, you should have a basic understanding of how to create and use a UserForm.
Download the sample file if you want to see the finished product in Excel, or simply follow along below.
Sections:
How to Make a UserForm
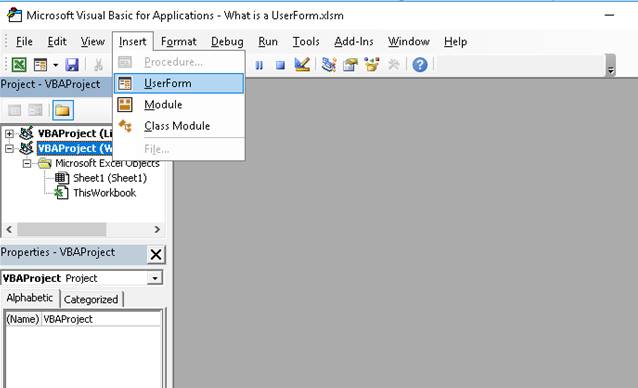
- Hit Alt + F11 to go to the VBA window. Then go to Insert > UserForm
You should now see something like this: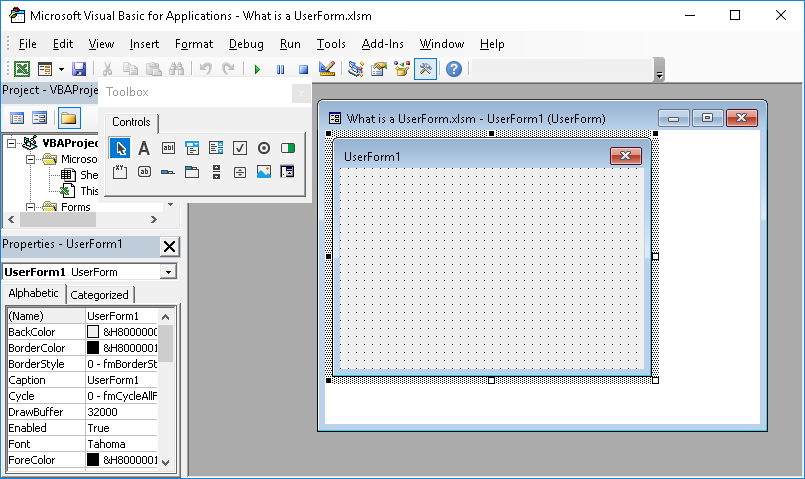
On the right, we have the blank UserForm and we can now begin to build it. - Edit the Title of the UserForm. Go to the Properties window on the bottom left and look to the line that says Caption and change the text on the right to whatever you want. (If you don't see the Properties window, make sure you have selected/clicked the UserForm; you can also go to View > Properties Window or hit F4 on the keyboard)
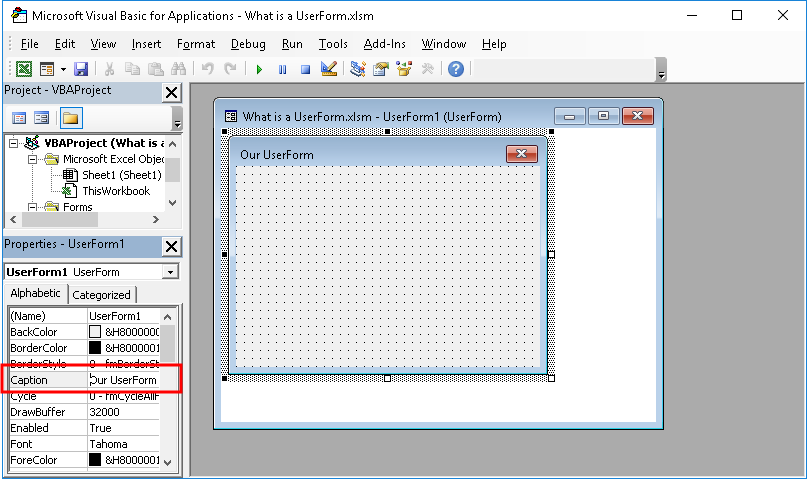
You should now see the title of the UserForm has changed too.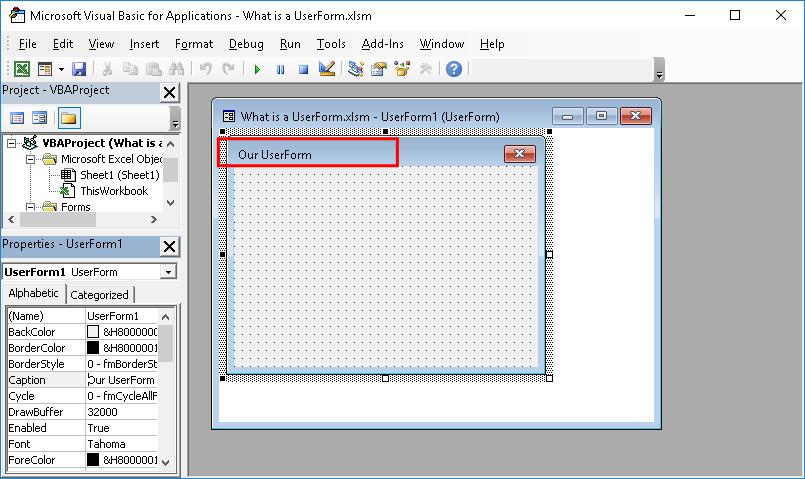
- Add some text to the UserForm. Click the UserForm and the Controls Toolbox should appear - if it doesn't, go to the menu View > Toolbox and it will appear.
Everything that you can add to a UserForm is called a "control."
In the Toolbox, click the A (Label)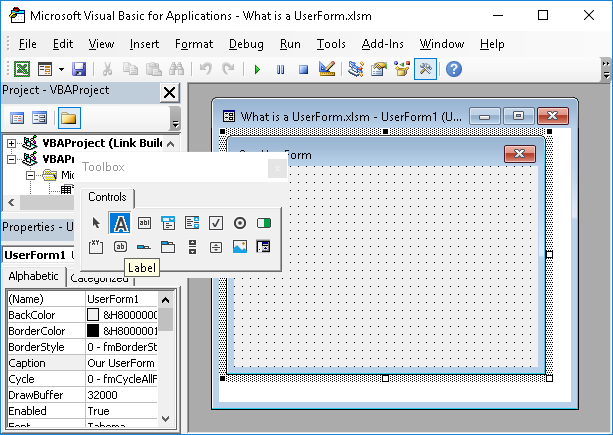
- Move your mouse to the UserForm and click and drag it to create a section where the Label will appear. Once you release the mouse button, the Label will appear on the form.
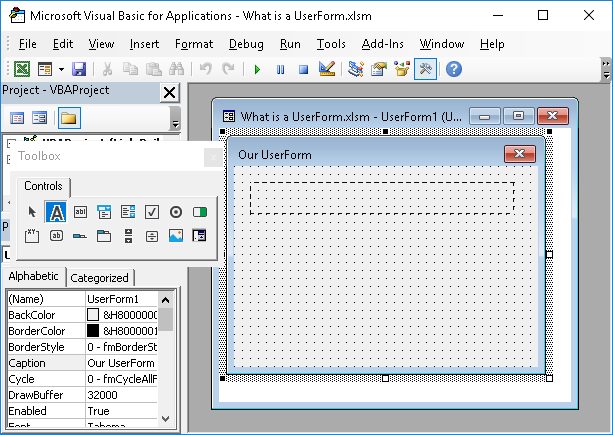
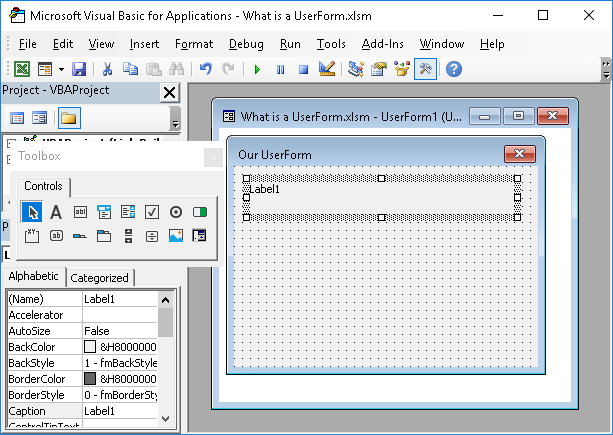
- With the label still highlighted, go to the Properties window and next to where it says Caption enter the text that you would like to appear in the label.
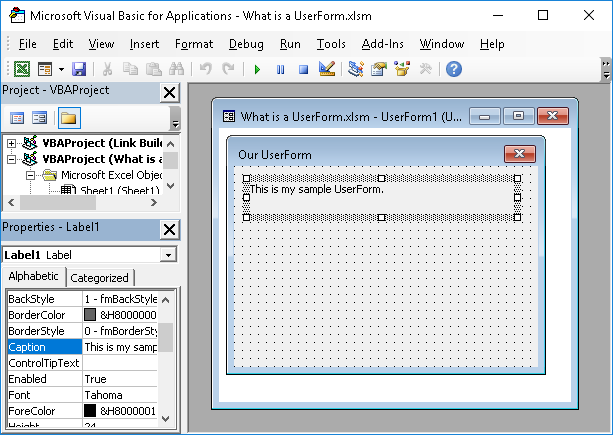
- To change the appearance of the text, click the Font section in the Properties window and then click the small button with 3 dots that appears.
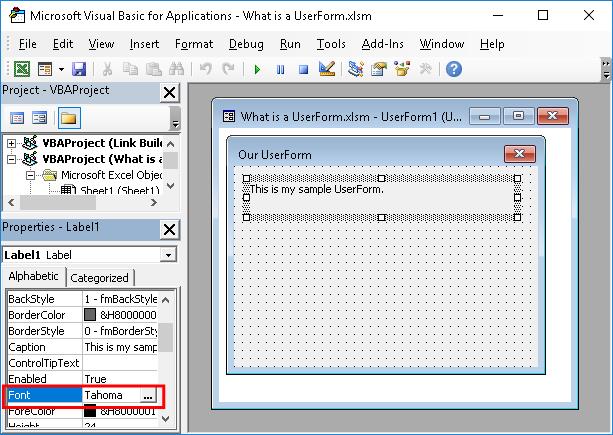
From this window, you can change the color of the text, its size, and its appearance.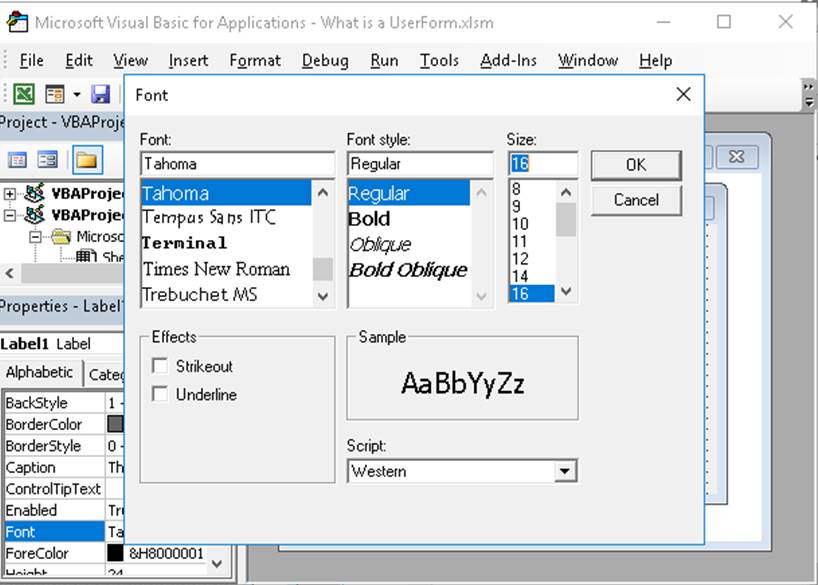
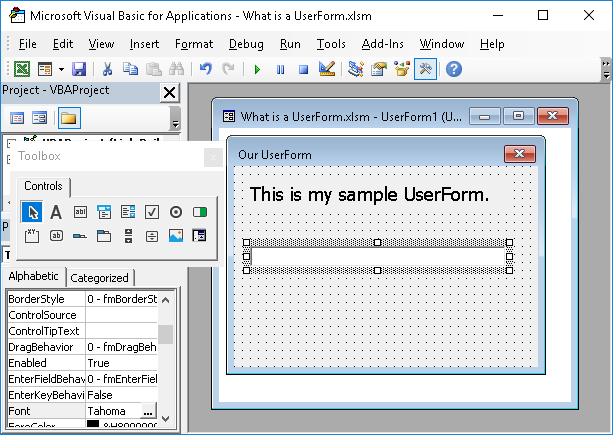
- Add a textbox so the user can enter something into the UserForm.
Click the TextBox button from the Controls box and then move your mouse over the UserForm and click and drag to size and then insert the TextBox; release the mouse button to put it into the form.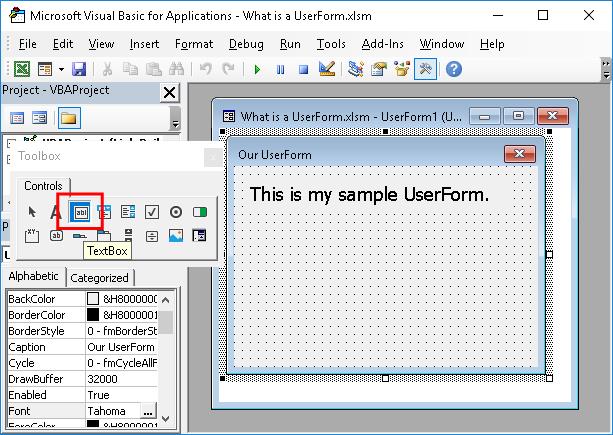
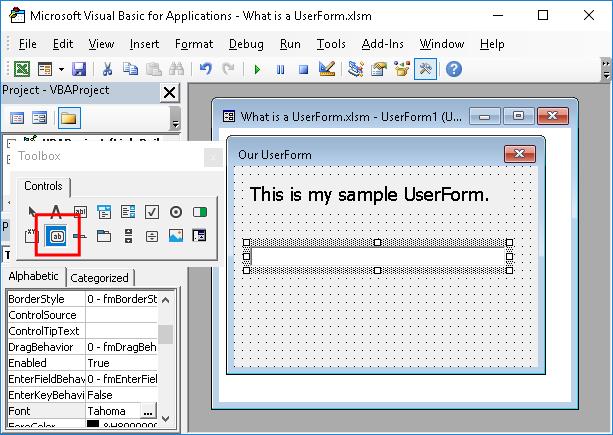
- Repeat step 7 for a CommandButton - these are the buttons that you click on the form.
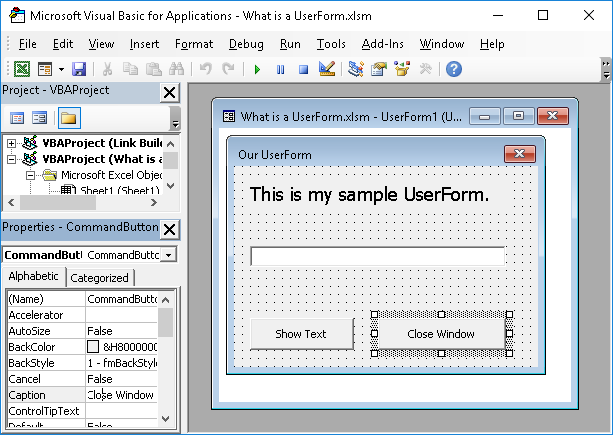
- To change the text that appears in the buttons, click the button on the form and edit the Caption section in the Properties window.
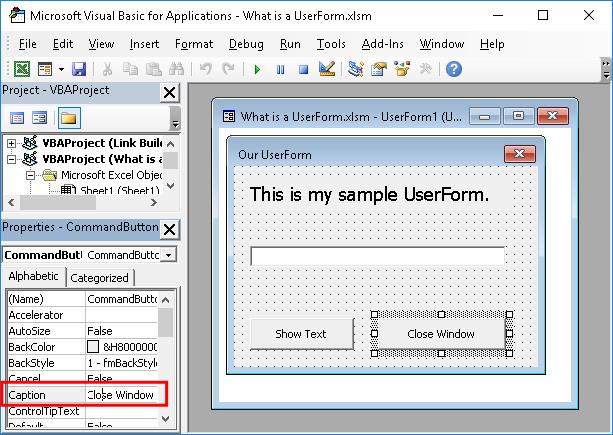
Now, we have created a very basic and simple UserForm.
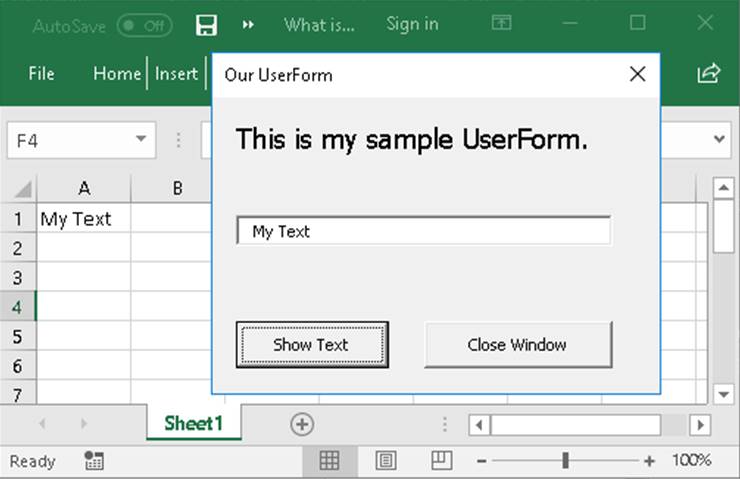
If you view it in Excel, it looks like this:
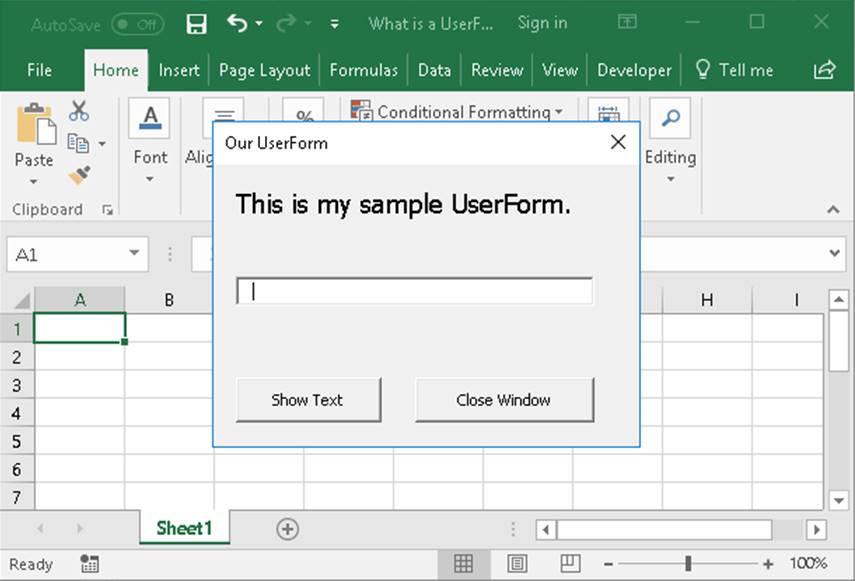
It's a nice UserForm, but it doesn't actually do anything yet.
In the next section, we will add some functionality to the UserForm and make everything work.
Make the UserForm Work
Display the UserForm
Method 1
Go to the VBA window (Alt + F11) and select the UserForm and then hit F5. This will launch the UserForm in Excel. From there, you can close the window by clicking the X in the upper-right corner of the window.
Method 2
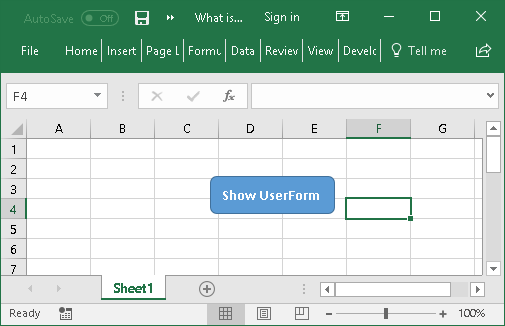
Method 1 is not practical for a regular user of Excel. To launch the UserForm in a more intuitive way, we need to make a small macro and attach it to a button in Excel.
Here is the code that we need:
Sub ShowUserForm()

UserForm1.Show

End Sub
UserForm1 is the name of the UserForm - you see this when you click the UserForm in the VBA window and then look to the (Name) section of the Properties window.
Put the above macro into a Module - VBA window (Alt + F11) > Insert > Module.
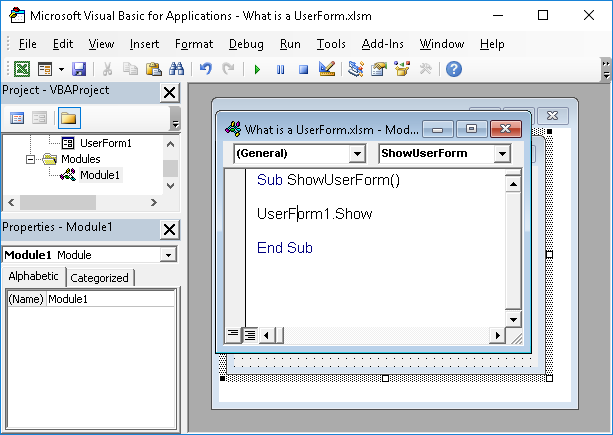
You can run the above macro any way you like; I prefer to attach the macro to a button in Excel that will then show the UserForm when it is clicked.
Close the UserForm
In the VBA window (Alt + F11), go to the UserForm (if you don't see it, just double-click it from the ProjectWindow on the left) and double-click the button that will cause the UserForm to be closed.
Once you double-click the button, you should see a window open that looks like this:
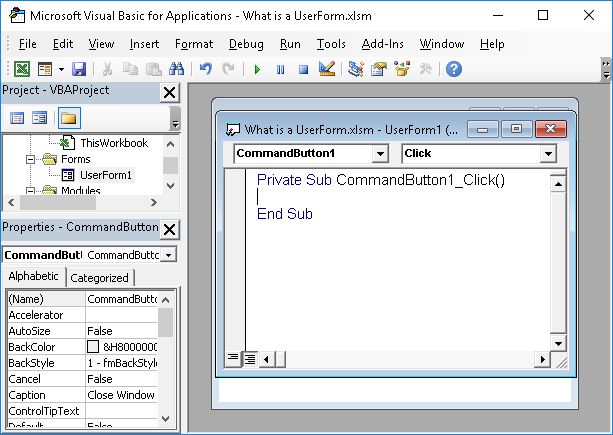
Put this piece of code in there:
Unload Me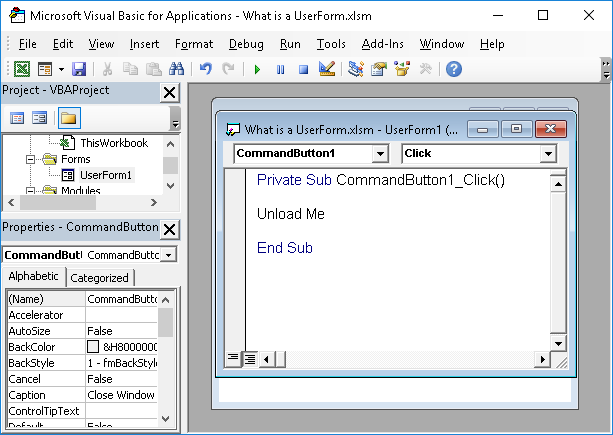
Now, when you have the UserForm open, just click this command button and it will close.
In my example, the Close Window button closes the UserForm. The other button still doesn't do anything yet.
Get a Value from the User and Put it into Excel
Let's take the input from the TextBox in the UserForm and have it placed into the spreadsheet when the user clicks the button Show Text.
- Get the name of the TextBox; we use the name to reference the text box in order to get the value that the user will type into it.
Click the Textbox and look to the (Name) section of the Properties window.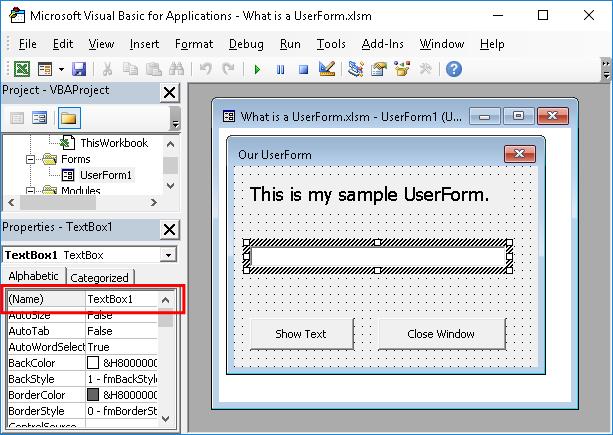
- Double-click the Show Text button, the button that we want to use to cause something to happen with the text; you should now see the code window and your cursor blinking in a new section of the code.
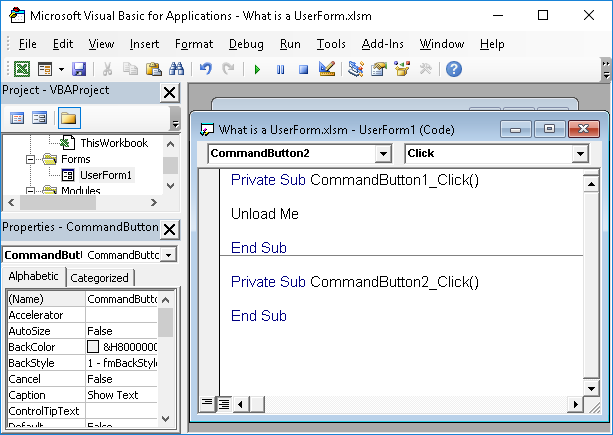
- In the window that opens, tell the UserForm to do whatever we want to do with the value that is put into the text box.
Here, I'll tell it to put this value into cell A1 of the worksheet named "Sheet1"
In the above code, TextBox1 is the name of the TextBox that we got from step 1.Sheets("Sheet1").Range("A1").Value = TextBox1.Text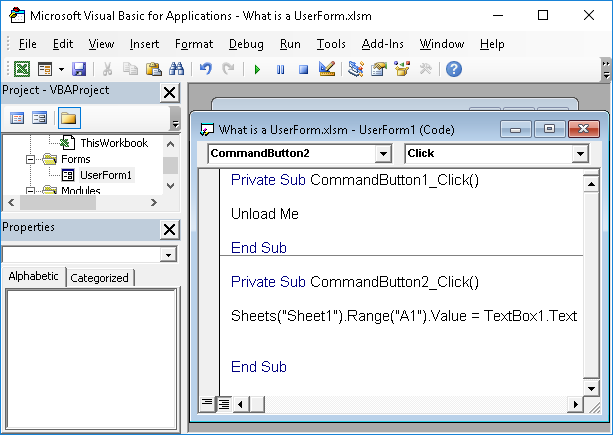
Note: once you double-click the button and see this code window, you will see all of the code that is specific to any event within the UserForm. This means that you will see the code that runs when the other command button is clicked, "Unload Me". An event is when something happens or is done to a UserForm.
There may be many pieces of code on this screen and you will put your code into the section that contains the blinking cursor after you double-clicked the button. - Run the UserForm now and test it out!
Here is the final result:
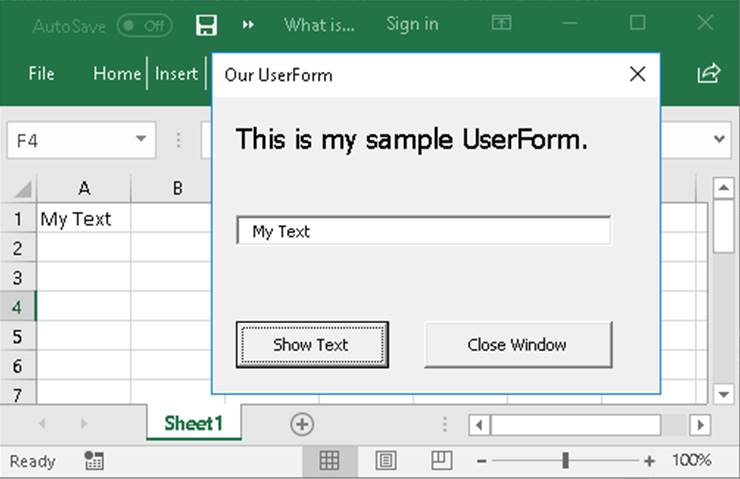
Once you click the Show Text button, whatever was typed into the TextBox will now appear in cell A1.
Notes
As you can see, creating a fully functioning UserForm is really not difficult and can be done in less than an hour for anyone who simply reads this tutorial. Now, there are a lot of other ways to display and work with data in UserForms, but this tutorial should get you up and running with the basic concept and a basic working example.
Make sure to download the sample file for this tutorial to see the working example in Excel.


