How to Add Boxes, Buttons, Arrows, Speech-Bubbles, Hearts, and More to a Spreadsheet in Excel
In this tutorial I am going to cover inserting and editing Shapes in an Excel workbook, as well as adding text to them.
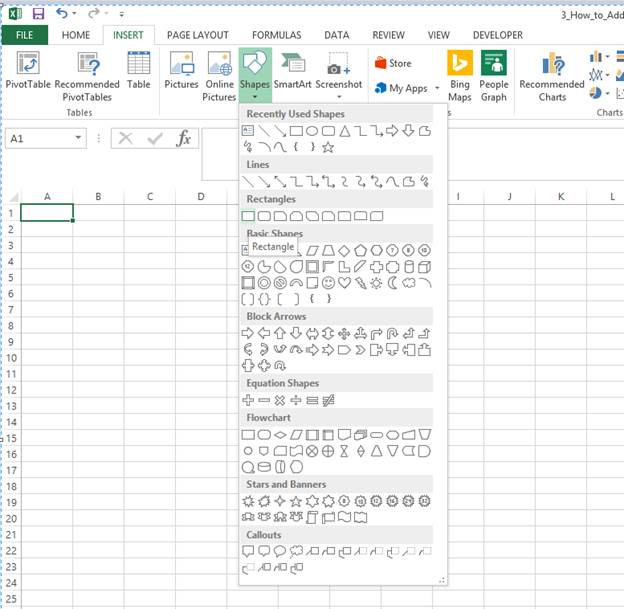
Adding Shapes to a Workbook in Excel
To access shapes you navigate to the Insert tab then the Shapes dropdown from the Illustration section.
To insert a shape just click on the desired shapes icon and the cursor will then change to a cross. You then click again where you want your shape to start and then drag to size.

Changing the Size/Position of a Shape in Excel
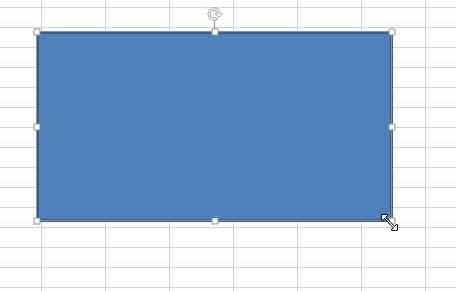
If at any point you are unhappy with your shapes position/size. Simply left click the shape and the cursor will change to an arrow in each direction. This indicates that you can now click and drag the shape to a new position.
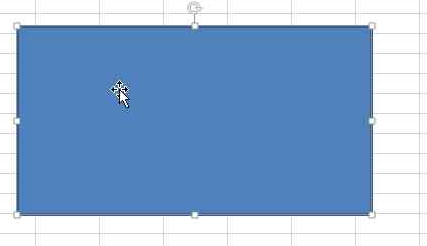
To resize just click the shape then click and drag 1 of the 4 sides or 1 of the 4 corners. Notice that the cursor will change to 2 arrows pointing in opposite directions to indicate the way in which you can resize the currently selected shape. You can also rotate a shape by clicking on the clockwise rotating arrow above the top center point of your selected shape.
Accessing the Formatting Options for Shapes in Excel
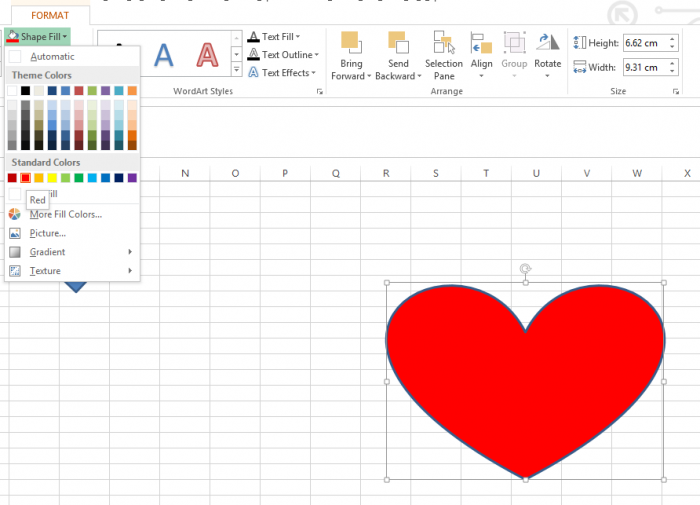
To edit the formatting of a shape, select the shape then click the Format tab.
Note: The Format tab only appears when a shape is selected.

There is a vast range of formatting options here so Ill just demonstrate a few examples and wont go into too much detail for each. Changing the fill color of a shape works the same way as adding a cell fill color. Just select the shape and then select a color from the Shape Fill color picker.
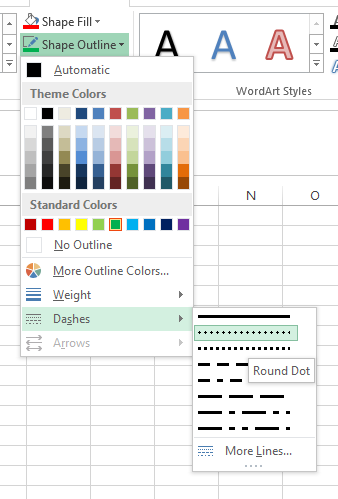
You can also adjust the outline of a shape. To do this you just select the Shape Outline dropdown and choose from the various options. You can change the color, weighting (thickness) and the style (complete line or various dash arrangements).

Adding Preset Effects to Shapes in Excel
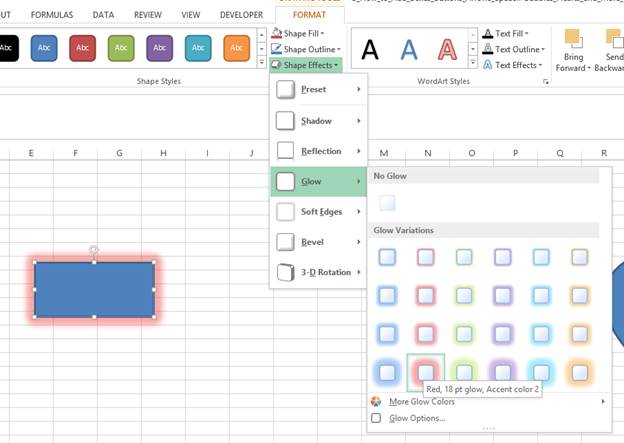
Another thing you can add is Shape Effects. These are visually impactful presets that can do things like adding a hover effect, shadow, glow, and even 3-D effects. (this is a fun feature to play around with when youre bored at the office!)
These are accessed from the Shape Effects dropdown. The various icons here will indicate how applying an effect will look on your shape.
Adding Text to a Shape in Excel
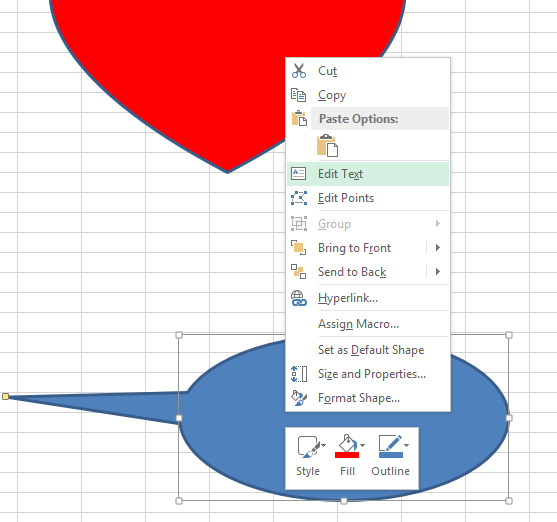
Text can be added to any shape, just right-click and select Edit Text. You can then start typing as if you are adding text to a cell. For example, I have typed Hello! into a speech bubble (Excel refers to these as Call Outs).
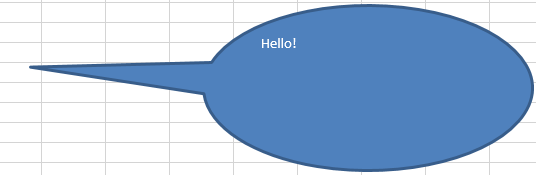
As you can see this text is quite small so I need to edit it. I do this by going to the usual Font tools located on the Home tab.
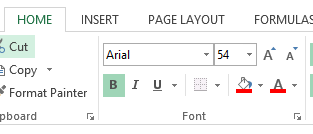
I have enlarged the text and made it bold so is therefore much clearer. You can change these as normal and they will affect the text in your shape as long as it is still selected.

Have a play around with the various shape formatting options in order to better understand what formats look good and meet your personal preference.
Shapes Stacked on Shapes
As you add more and more shapes to the worksheet you may start to have shapes stacked together, which will prevent you from seeing some shapes.
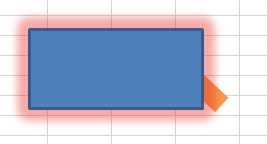
Above, the smaller rectangle is mainly hidden from view due to the larger one. To adjust the order in which a set of shapes are stacked you can use the Bring Forward and Send Backward options on the Format tab (alternatively you can right-click to get the same options).
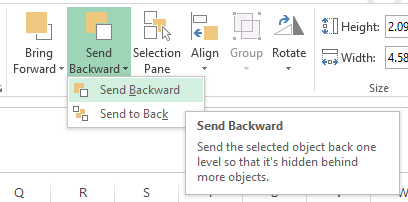
I can either select the larger rectangle and send it to the back (behind the smaller one) or select the smaller rectangle and bring it to the front (in front of the larger one). Both will have the same result.
These buttons have a pretty basic function; they bring a shape more to the front of the worksheet or send a shape further to the back of a worksheet.
Note: Send to Back and Bring to Front will send the shape to the very back (behind every shape in the worksheet) and bring it to the very front (in front of every shape in the worksheet) respectively.
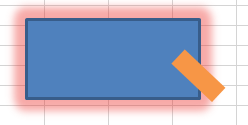
By sending the larger rectangle to the back you can now see the smaller rectangle.
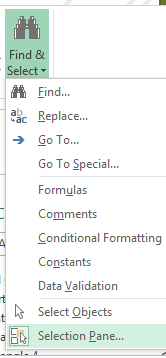
A better way to adjust the stacking of your shapes and see all the shapes on the current worksheet at the same time is to use the Selection Pane. The Selection Pane is found on the far right of the Home tab within the Find & Select dropdown.
Here is what the Selection Pane looks like:
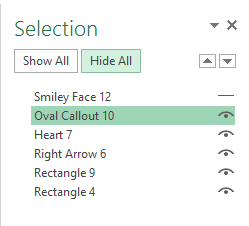
From this menu, you can select 1 or more shapes at once and use the Up/Down arrow to adjust the order in which they appear / stack. From here you can see all shapes on the current worksheet whether they are shown or hidden. To hide a shape just click the open eye symbol next to it and to unhide click the closed eye / slit. The Selection Pane is much easier to use when sorting lots of shapes.
Note: As a learning exercise I have hidden an additional shape in the accompanying worksheet which you can unhide to reveal.
Question? Ask it in our Excel Forum
Excel VBA Course - From Beginner to Expert
200+ Video Lessons 50+ Hours of Instruction 200+ Excel Guides
Become a master of VBA and Macros in Excel and learn how to automate all of your tasks in Excel with this online course. (No VBA experience required.)
Tutorial: In this tutorial I am going to introduce you to creating and managing charts in Excel. Bef...
Tutorial: In this tutorial I will cover how to use the various formatting tools in Excel. The Format...
Tutorial: How to have a button in a UserForm disabled until the desired event occurs. For instance, ...
Tutorial: How to display a UserForm in Excel and some common things you might want to do when you di...
Tutorial: How to take data from Excel and put it into a UserForm. This is useful when you use a form...
Tutorial: How to highlight the rows of the top and bottom performers in a list of data. This allows...
Subscribe for Weekly Tutorials
BONUS: subscribe now to download our Top Tutorials Ebook!
Excel VBA Course - From Beginner to Expert
200+ Video Lessons
50+ Hours of Video
200+ Excel Guides
Become a master of VBA and Macros in Excel and learn how to automate all of your tasks in Excel with this online course. (No VBA experience required.)